
Trying to run an A/B test on WordPress with PostHog? Good luck finding clear guides. Hours of searching led me nowhere – plenty of broken methods, zero reliable steps. Because of that mess, here’s what actually works. No guesswork needed.
Here’s how I do it, every single time. Built for clarity, built to last – no guesswork, just results. Code that sticks around, steps that make sense. Less friction, fewer errors, zero drama.
Got everything ready? Check these things first if setting up a PostHog A/B test on WordPress should go smoothly. One missing piece might slow things down later
- You have an active PostHog account with valid login credentials.
- PostHog is already installed on your WordPress website. If not, follow this PostHog installation guide for WordPress to set it up quickly.
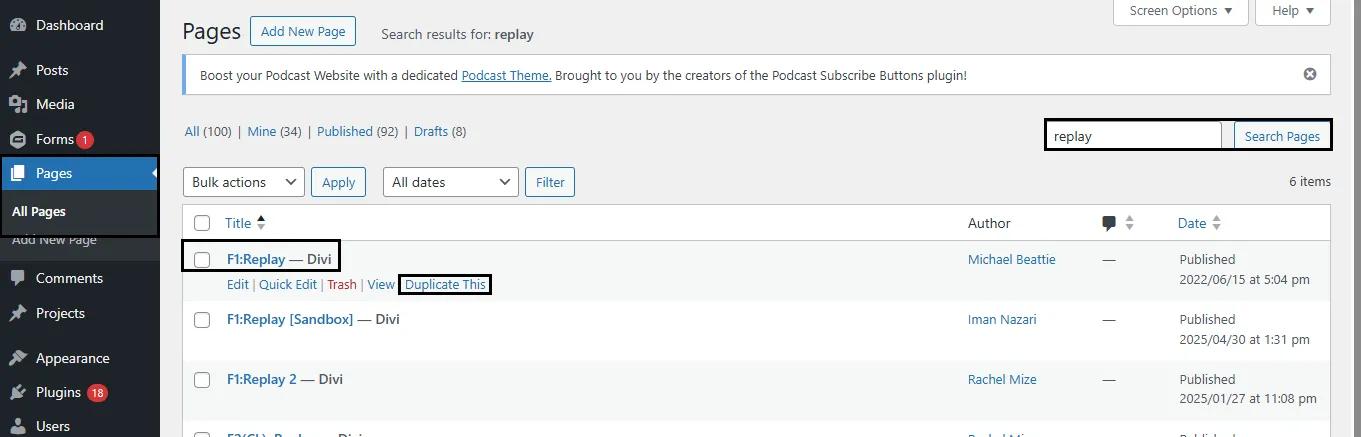
Step 1: Duplicate the Page You Want to Test
Falling back on this feels like catching yourself before the ground gets close
Jump into your WordPress dashboard, then open the Pages section. Spot the page you’d like to try something new on – hit the option that says Duplicate This (tools such as Yoast Duplicate Post usually handle this smoothly). Give the copied version a fresh name so it stands out down the line – maybe tack on “Test Version” at the end
A safe space opens up when the main page stays untouched. Experimentation finds its chance through separation.
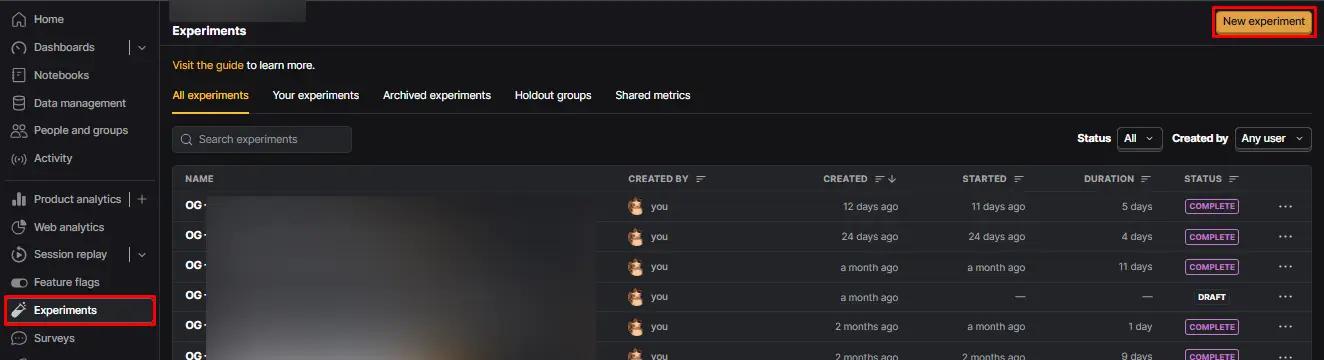
Step 2: Create an Experiment in PostHog
Start at PostHog by signing in. From the menu on the left, pick Experiments. After that, hit the button marked New Experiment.
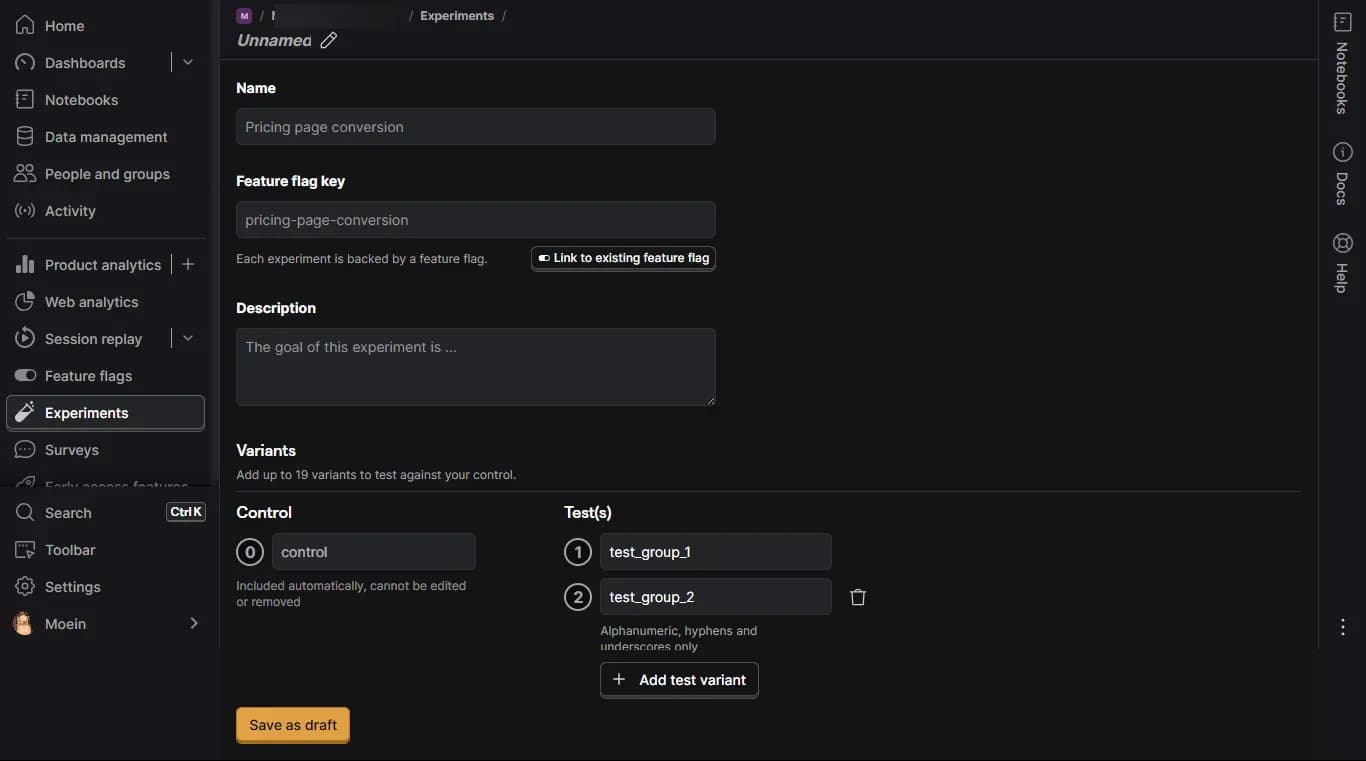
Fill in the required fields:
We use this general format for experiment name:
[Experiment number] – [Step of the Funnel/Page] – [Test Hypothesis]
For the feature flag key, keep it similar to the experiment name, but make it code-friendly by removing spaces, using lowercase, and converting the funnel step/page into an abbreviation or number.
Refer to the PostHog Experiment Naming Guidelines for best practices.
Add your control and test variants under the Variants section.
Click Save as draft when finished.
Click here to see a step-by-step guide for creating an experiment in PostHog.
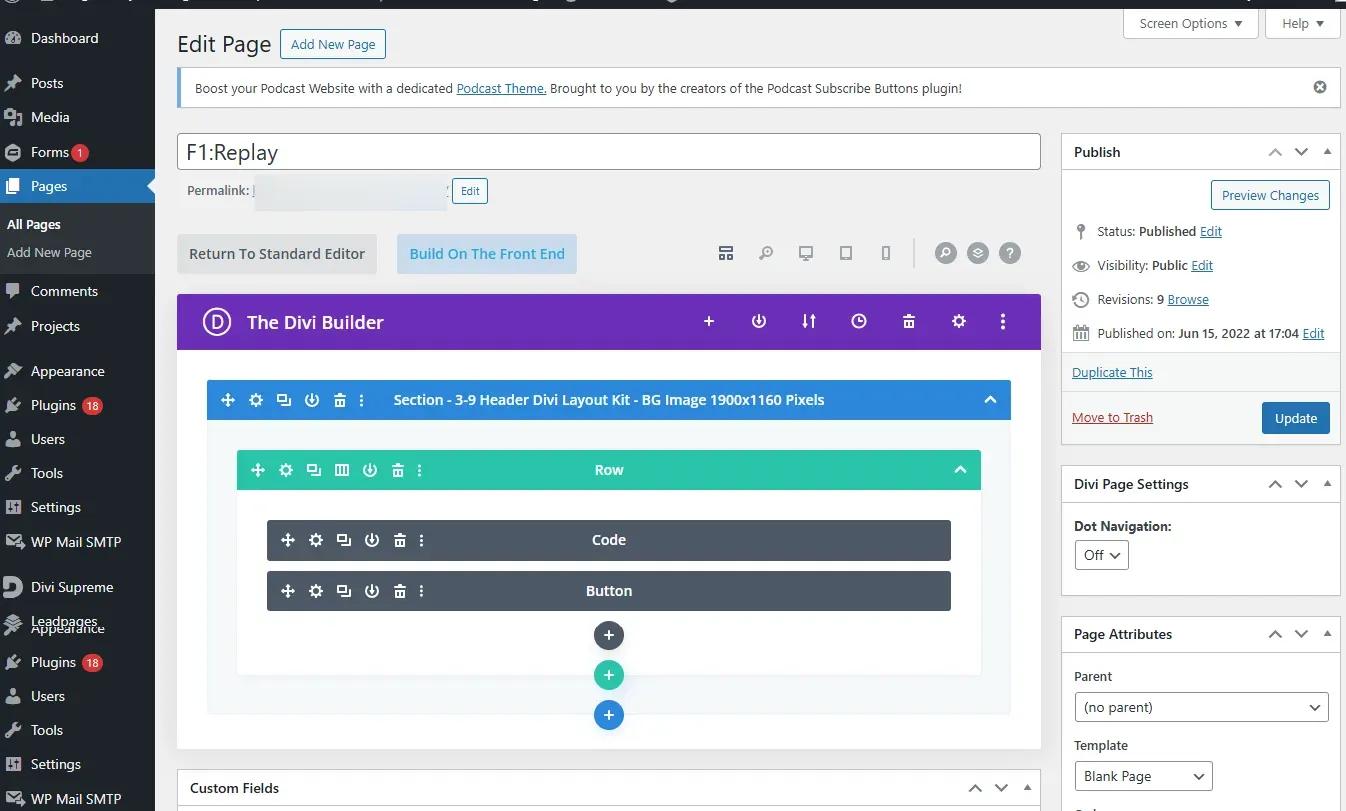
Step 3: Create the Variant Module(s) in WordPress
If you’re using the Divi Builder editor in WordPress, the page appears like this:
If you’re testing two variants, duplicate the relevant element/module twice:
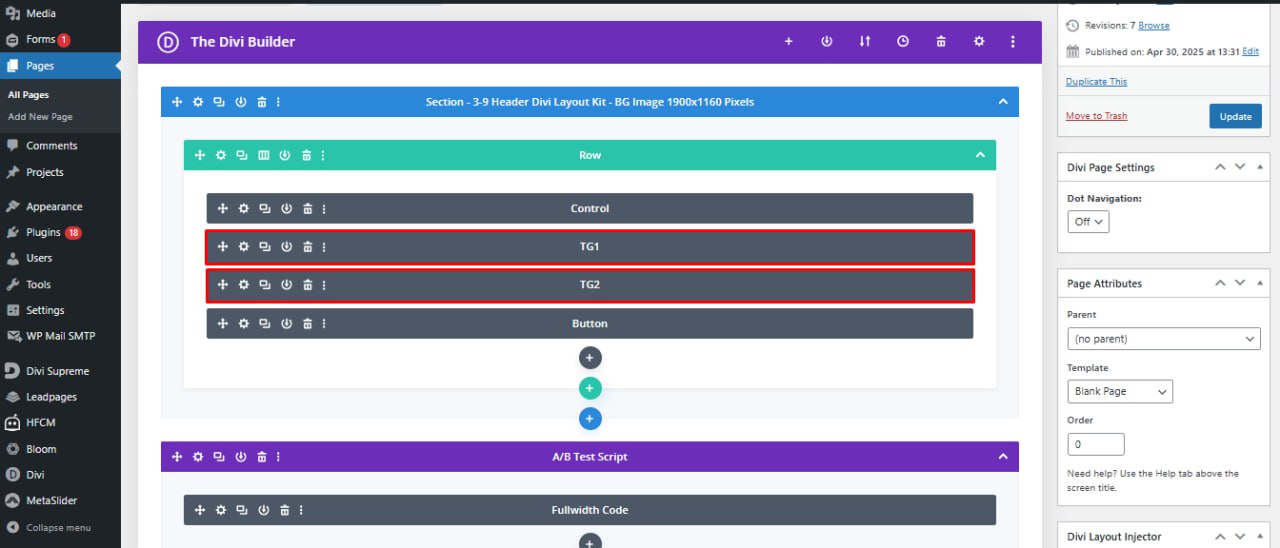
These are the example of the labels for easier naming process
- Label the original as Control; and
- Name the two test versions as TG1 (Test Group 1) and TG2.
Hide test groups by default:
If you’re using the Divi Builder, use the following method; otherwise, simply assign (display: none) to the element in Custom CSS field.
- Open Settings of the test group element.
- Go to Advanced → Custom CSS → Module Elements.
- In the Main Element field, enter: display: none;
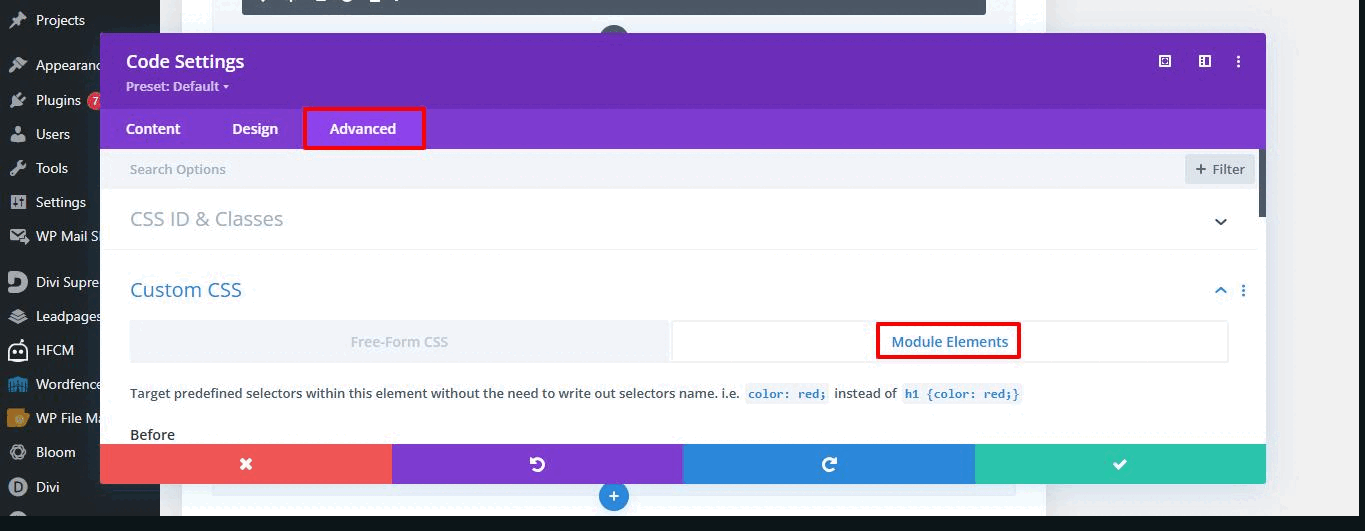
Repeat this for all test groups.
Note: You may need to fetch the variant modules based on the changes from developer or client.
The test elements should be hidden by default to ensure they are not visible when the user lands on the page, before the scripts begin loading and executing.
Step 4: Add the A/B Test Script to the Page Footer
Scroll to the bottom of the duplicated page and then, create a new section just above the footer. Insert the following script there:
We use custom code to hide the control elements and display the test elements based on the assigned variant.
The script will require adjustments based on your test setup; these are explained in the next step.
Ensure you saved your changes.
Step 5: Adjust your script to match the content of the page
Each element (Control, TG1, TG2, etc.) must have a unique CSS ID:
To set it:
- Open the module settings
- Go to Advanced → CSS ID & Classes
- Assign an ID (e.g. control, tg1, tg2)
Update the script from last step using real CSS selectors, the following variants are listed below:
- Replace ‘YOUR_FEATURE_FLAG_KEY’ with the actual Feature Flag Key from your PostHog experiment.
- Replace ‘original-element’ and ‘#variant-one-element’ and ‘#variant-two-element’ with the actual CSS IDs of the control and test elements.
This ensures that the control is hidden and the correct variation is shown when the test group is active.
Note: To find the correct CSS IDs, use your browser’s Inspect tool (F12) and locate the elements under the Elements tab. Each block should have a unique ID or attribute.
Step 6: Quality Check the Variants
To test each variant, add Feature Flag Key to the page URL:
Format: [your page url]/?[Feature Flag Key]=[variant name]
Repeat this for each variant to ensure they render as expected.
For example, we’ve built a dedicated test page on our website to run an A/B test. In this experiment, we have one control group and two test variations: Test Group 1 and Test Group 2.
The only difference between these three versions is the heading, which allows us to isolate the impact of this specific element. To keep things clear, each version displays a heading that identifies the group.
When a user visits the test page, they are randomly directed to one of the three versions. We track user behavior and performance across these variants using PostHog.
To verify that each variant is loading correctly, we add the Feature flag key to the end of the URL like the upper format:
Test Group 2:
https://99ways.io/experiment-test-page/?001-about-page-Heading-test=test_group_2

Step 7: Publish Your A/B Test on PostHog
To launch the experiment as part of your effort to setup PostHog A/B test on WordPress, you need to define the primary metric first:
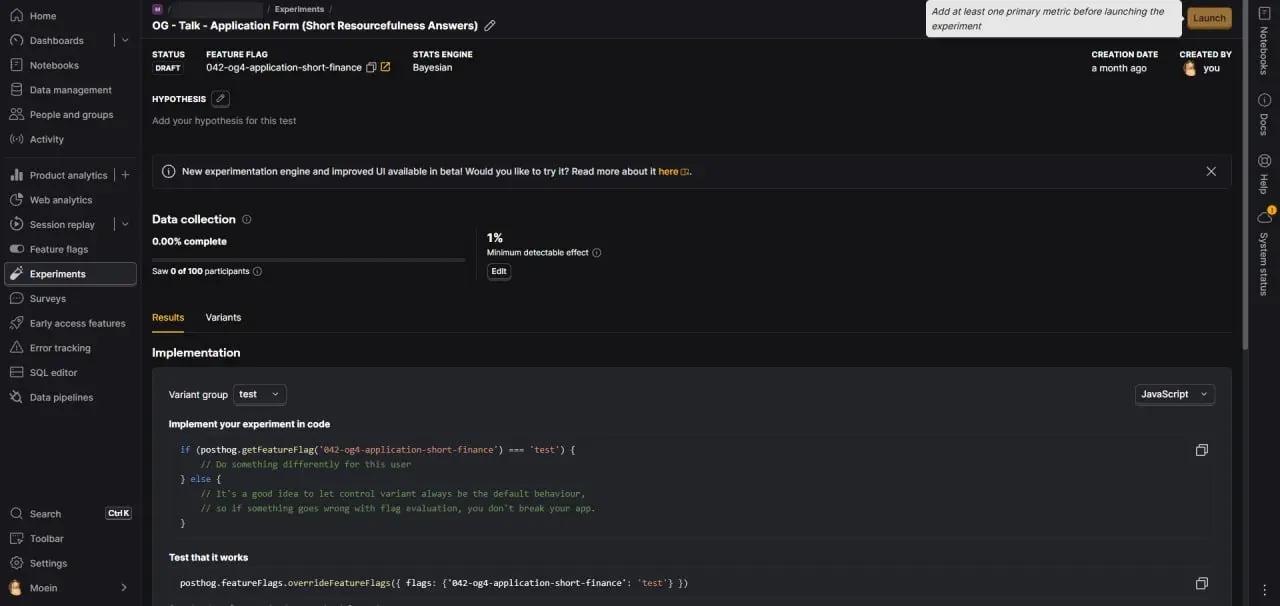
Open your saved experiment in PostHog.
Scroll to Primary metrics and click Add primary metric.
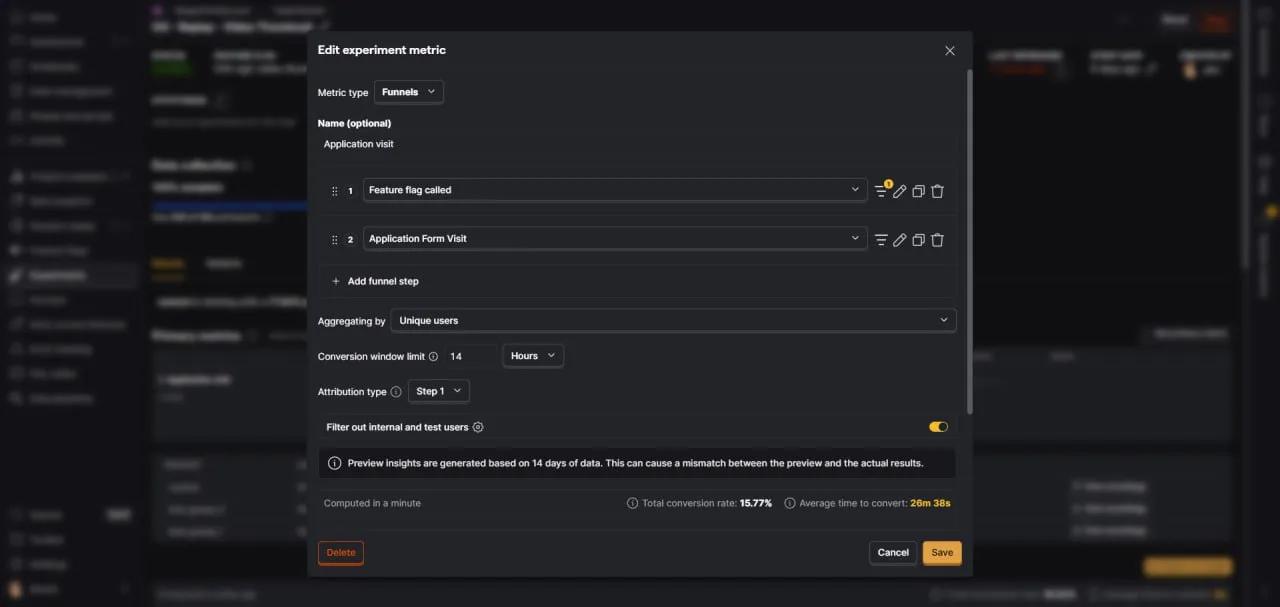
Choose Funnels as the metric type and define your steps (e.g., Feature flag called → Form Visit).
Adjust the Attribution type, set the Conversion window limit, and save.
Scroll to the top and click the Launch button.
Your experiment is now live and will start tracking performance based on your chosen metric.
To better understand the Experiment metric, check out the linked article.
After confirming the test is working properly, assign the original live URL to the duplicated page. Then, rename the original page’s URL to prevent any conflicts.
For the latest guidance on integrating PostHog with your WordPress site, read our updated article: “Best Ways to Install PostHog on WordPress in 2025“