
Should you care about user behavior and refining your site, consider PostHog. This tool stands tall among analytics options – use it well, and watch how it reshapes efforts to boost conversions.
Here’s what tends to unfold. Dive into PostHog before getting the setup right, results often include disorganized data, flawed conclusions, even surprise bills. This isn’t rare. Watched it play out countless times.
This guide shows you step by step how to set up a PostHog account correctly, starting with registration then moving into setup and what comes after, letting you begin fast with clear useful information.
Why PostHog Deserves Your Attention
Here’s the thing about PostHog – spending a moment on it makes sense once you see what it does.
- One tool handles everything. Tracking what users do sits alongside recordings of their visits. Flip on new features safely, without rolling out fully. Test two versions at once shows which works better. Everything fits together, no extra pieces needed.
- Your data stays yours. Because PostHog runs on your own servers, it skips the usual third-party tracking others rely on. Control shifts to you – no middlemen involved.
- Starting strong right away – if your business scales fast, PostHog shows exactly which features get used. Not just guesses. Real clarity comes when you see how people actually move through your app or site. Because of this, decisions feel less like shots in the dark. Even complex setups make sense once patterns emerge. From online shops to software tools, it fits without forcing change. When things shift, insights stay sharp.
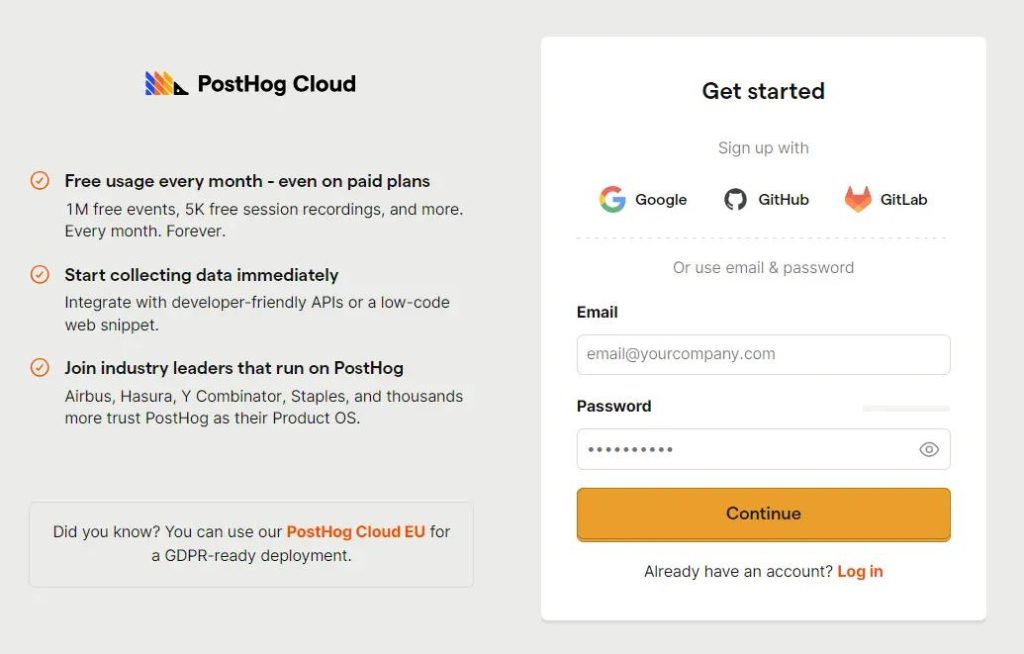
Step 1: Sign Up for PostHog Cloud
Better start at the beginning – getting set up means signing up.
Start at PostHog Cloud. Those in the United States should follow this path instead. Over in Europe? Try this option here. That way, local rules around data are properly followed.
Here’s something worth noting: try PostHog Cloud first, even when aiming to run it yourself down the line. Getting going takes less time that way. You get hands-on fast, skip the setup snags. A smoother entry point while skipping server puzzles early on.
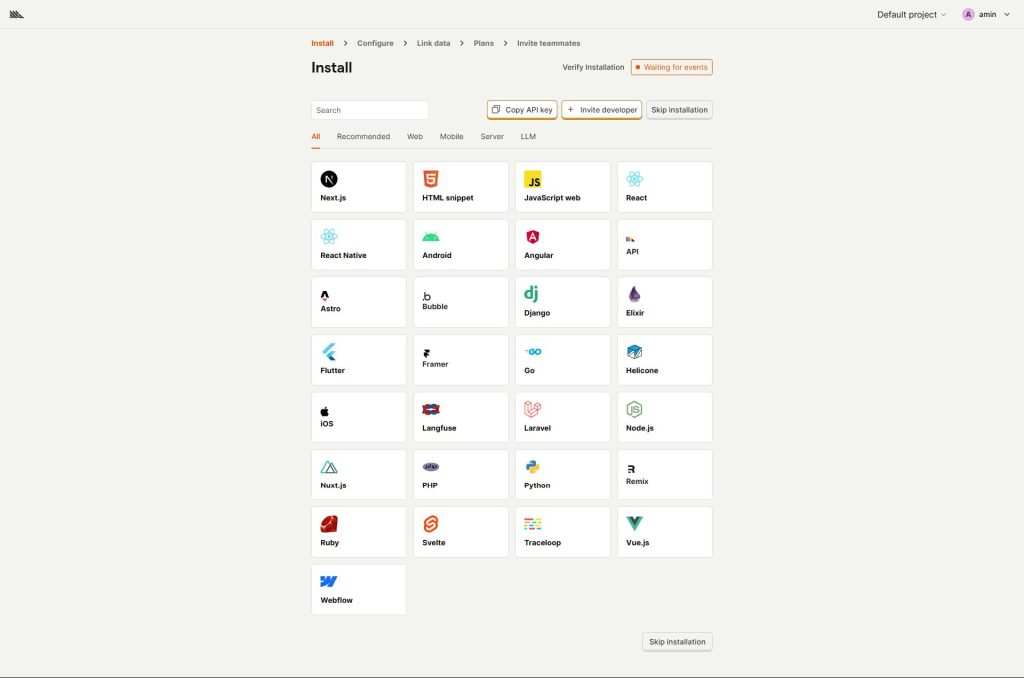
Step 2: Complete the Product Analytics Onboarding
Here’s when things start to shift. The spark shows up right around now.
Start here – PostHog’s setup turns raw data into real insight. Move step by step, since each choice shapes how numbers behave later. This first stage does more than welcome; it builds the frame for what comes next.
Start by placing the given HTML piece into your website’s structure. When on WordPress, Shopify, or similar systems, step-by-step setup help comes straight from PostHog.
When running WordPress, Shopify, or ClickFunnels, take a look at our suggested code pieces. We slipped in handy tweaks – things like “autocapture” and “capture pageview” – to sharpen your tracking. Not locked to one system, these changes slide right into whatever setup you’re working with. Though built around certain tools, they travel well across platforms.
Start by setting up what gets tracked. Pick unique traits that matter to your setup. Choose specific actions worth watching closely. Include targets you plan to follow over time.
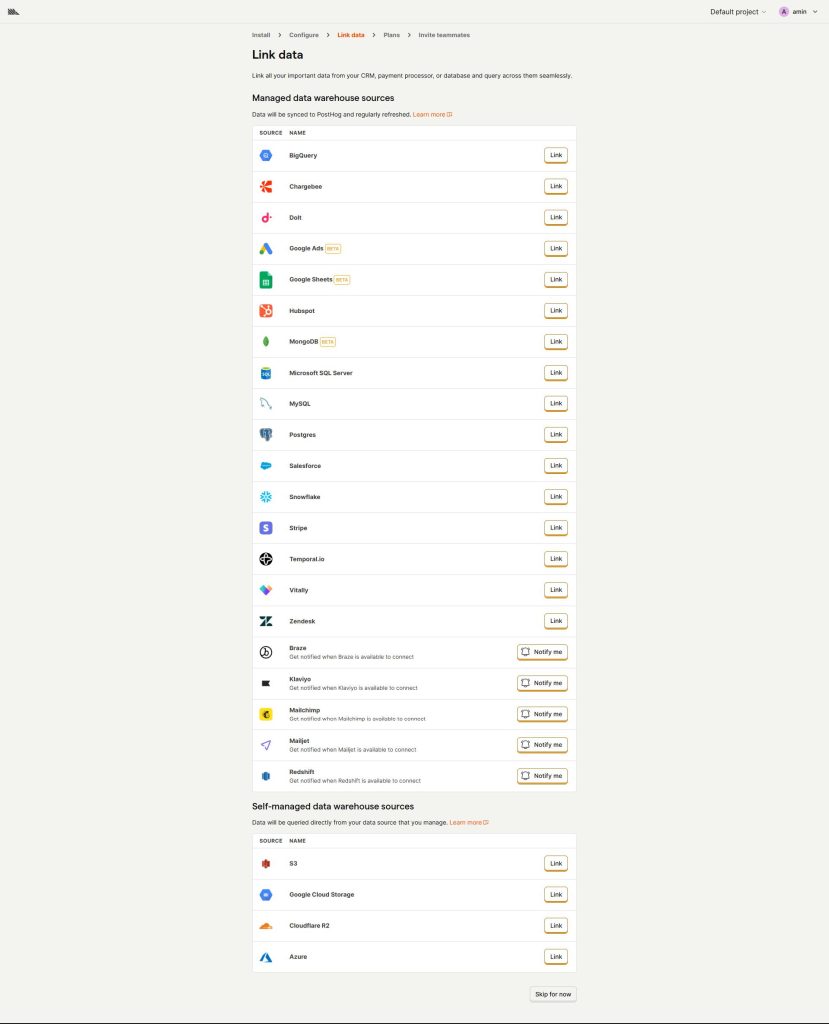
Start by bringing in your data. PostHog connects straight to outside systems – think customer records, ads, payments, storage hubs. Tools such as Google Ads or HubSpot plug right in, alongside Stripe, Chargebee, BigQuery. Instead of jumping between apps, everything flows into one place. That means insights pull from real usage, not guesses. Missing something on the list? Get updates when new links go live. Truth lives where all data meets.
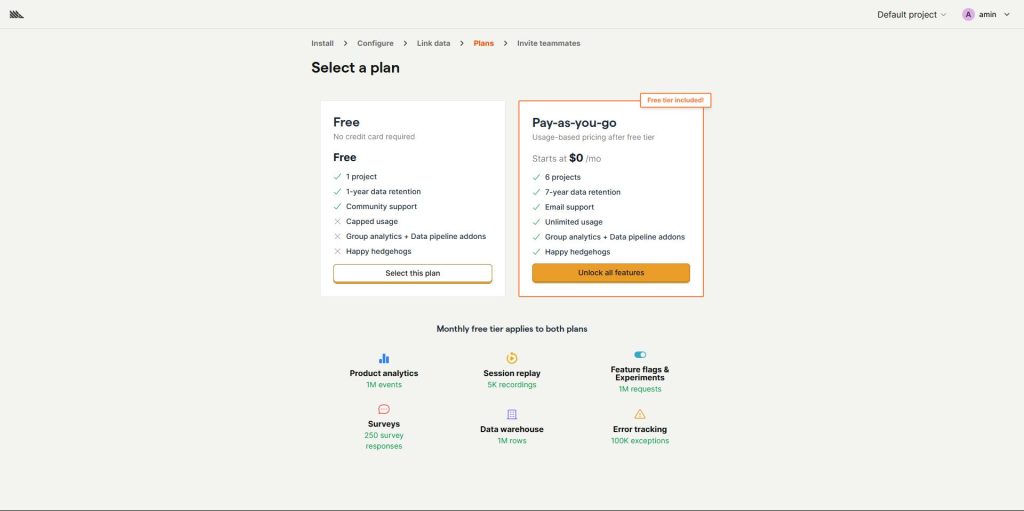
Start by picking your path: go with the solid free option, or step up to a paid level when fancy tools – say, juggling multiple test versions or tracking way more actions – matter to you.
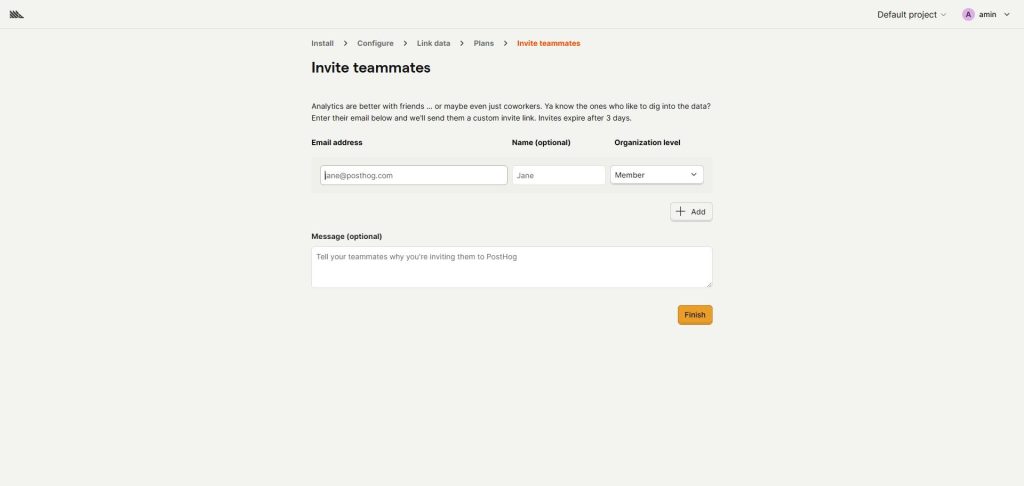
Start by pulling in your crew. Insights work best when shared across roles. Get coders on board at the start, then loop in campaign planners alongside those who steer strategy. Early invites mean fewer roadblocks later. When people see data firsthand, choices gain clarity. Teamwork here isn’t optional – it’s built into how results take shape.
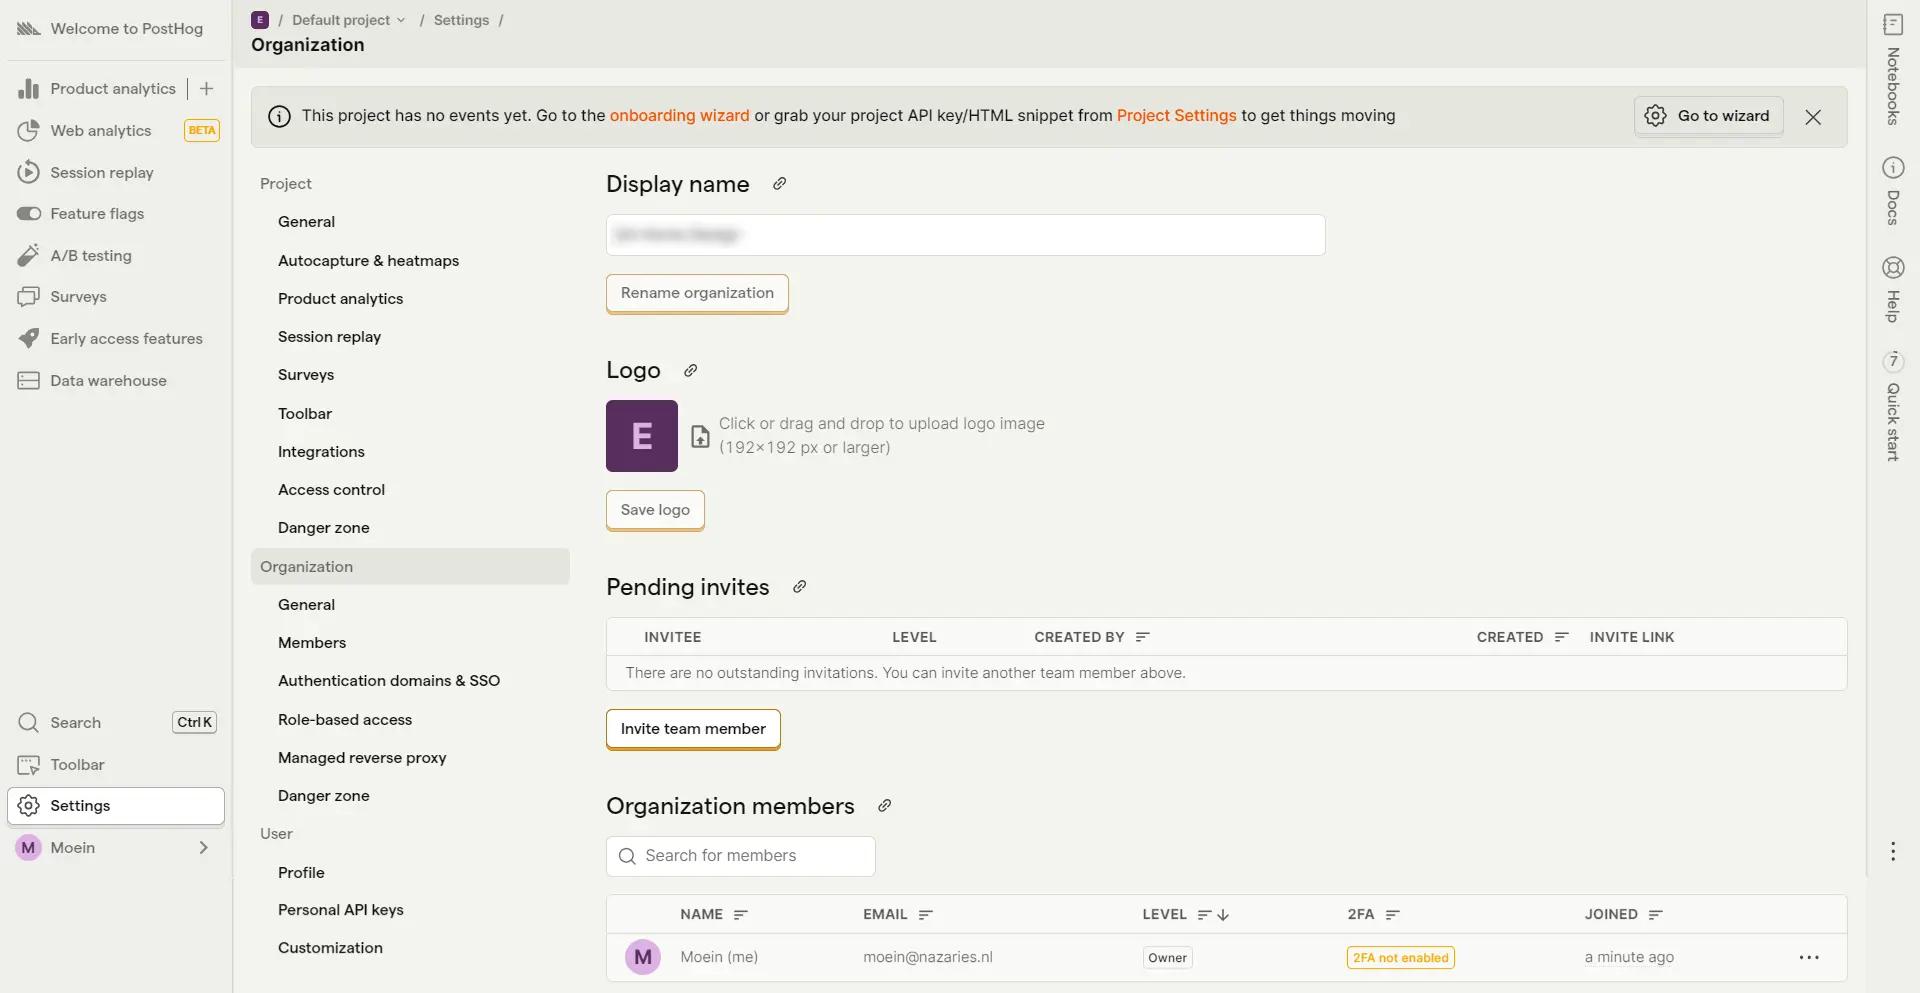
Step 3: Create Your Organization and Project
After finishing onboarding, go straight to the PostHog dashboard – this is where your workspace takes shape. Starting here makes everything click into place faster than expected.
- Start with one main space where every piece fits together. When handling more than a single brand or client, this spot holds it all. Everything links back right here.
- Inside every project sits one product or site, set apart. Tracking happens right there – events flow into views you shape yourself. This is where dashboards take form through your choices. Settings live here too, waiting to be adjusted. A separate world opens up per effort, quiet and focused.
Your organization is like a business, while your project stands for one specific product or location under review.
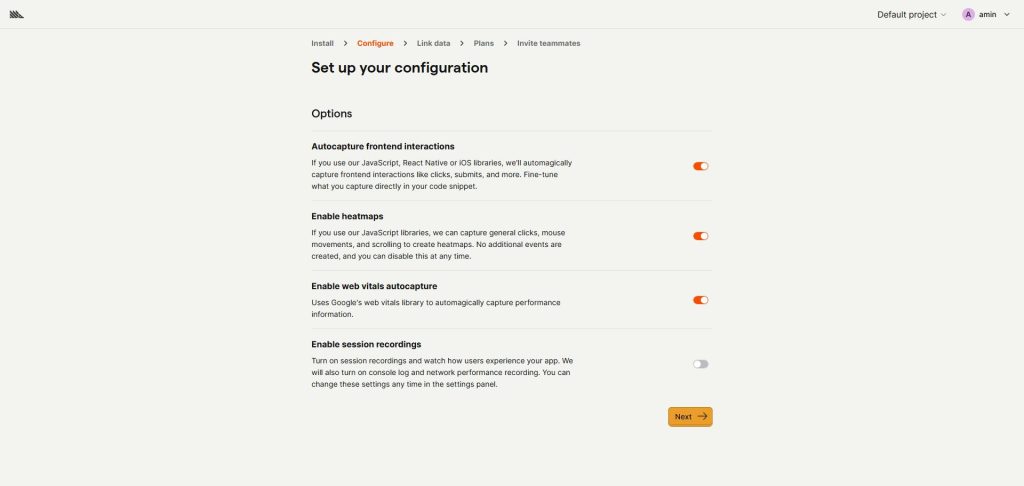
Step 4: Optimize Your Product Analytics Settings
Start by adjusting the controls until the numbers show what matters. Fixing these details helps the results make sense later on. Change one piece at a time, watch how it shifts the view. When each part lines up, the full picture finally appears clear.
- Messy reports often come from mismatched timing. Try setting PostHog to match where campaigns run. Picture Monday starting at midnight Tokyo time if that’s where ads launch. Slippery errors vanish when clocks line up. Even tiny offsets ripple into wrong numbers. Match the rhythm of each tool – start times, dates, everything. Syncing beats fixing later.
- Start by cutting out clicks from inside the company. When staff browse, those hits shouldn’t mix with customer data. Block work email addresses at the gate. That way, what you see reflects visitors – not coworkers hovering around. Real behavior stands clear when internal noise fades.
Little adjustments like these make the difference between “decent data” and “data you can confidently act on.”

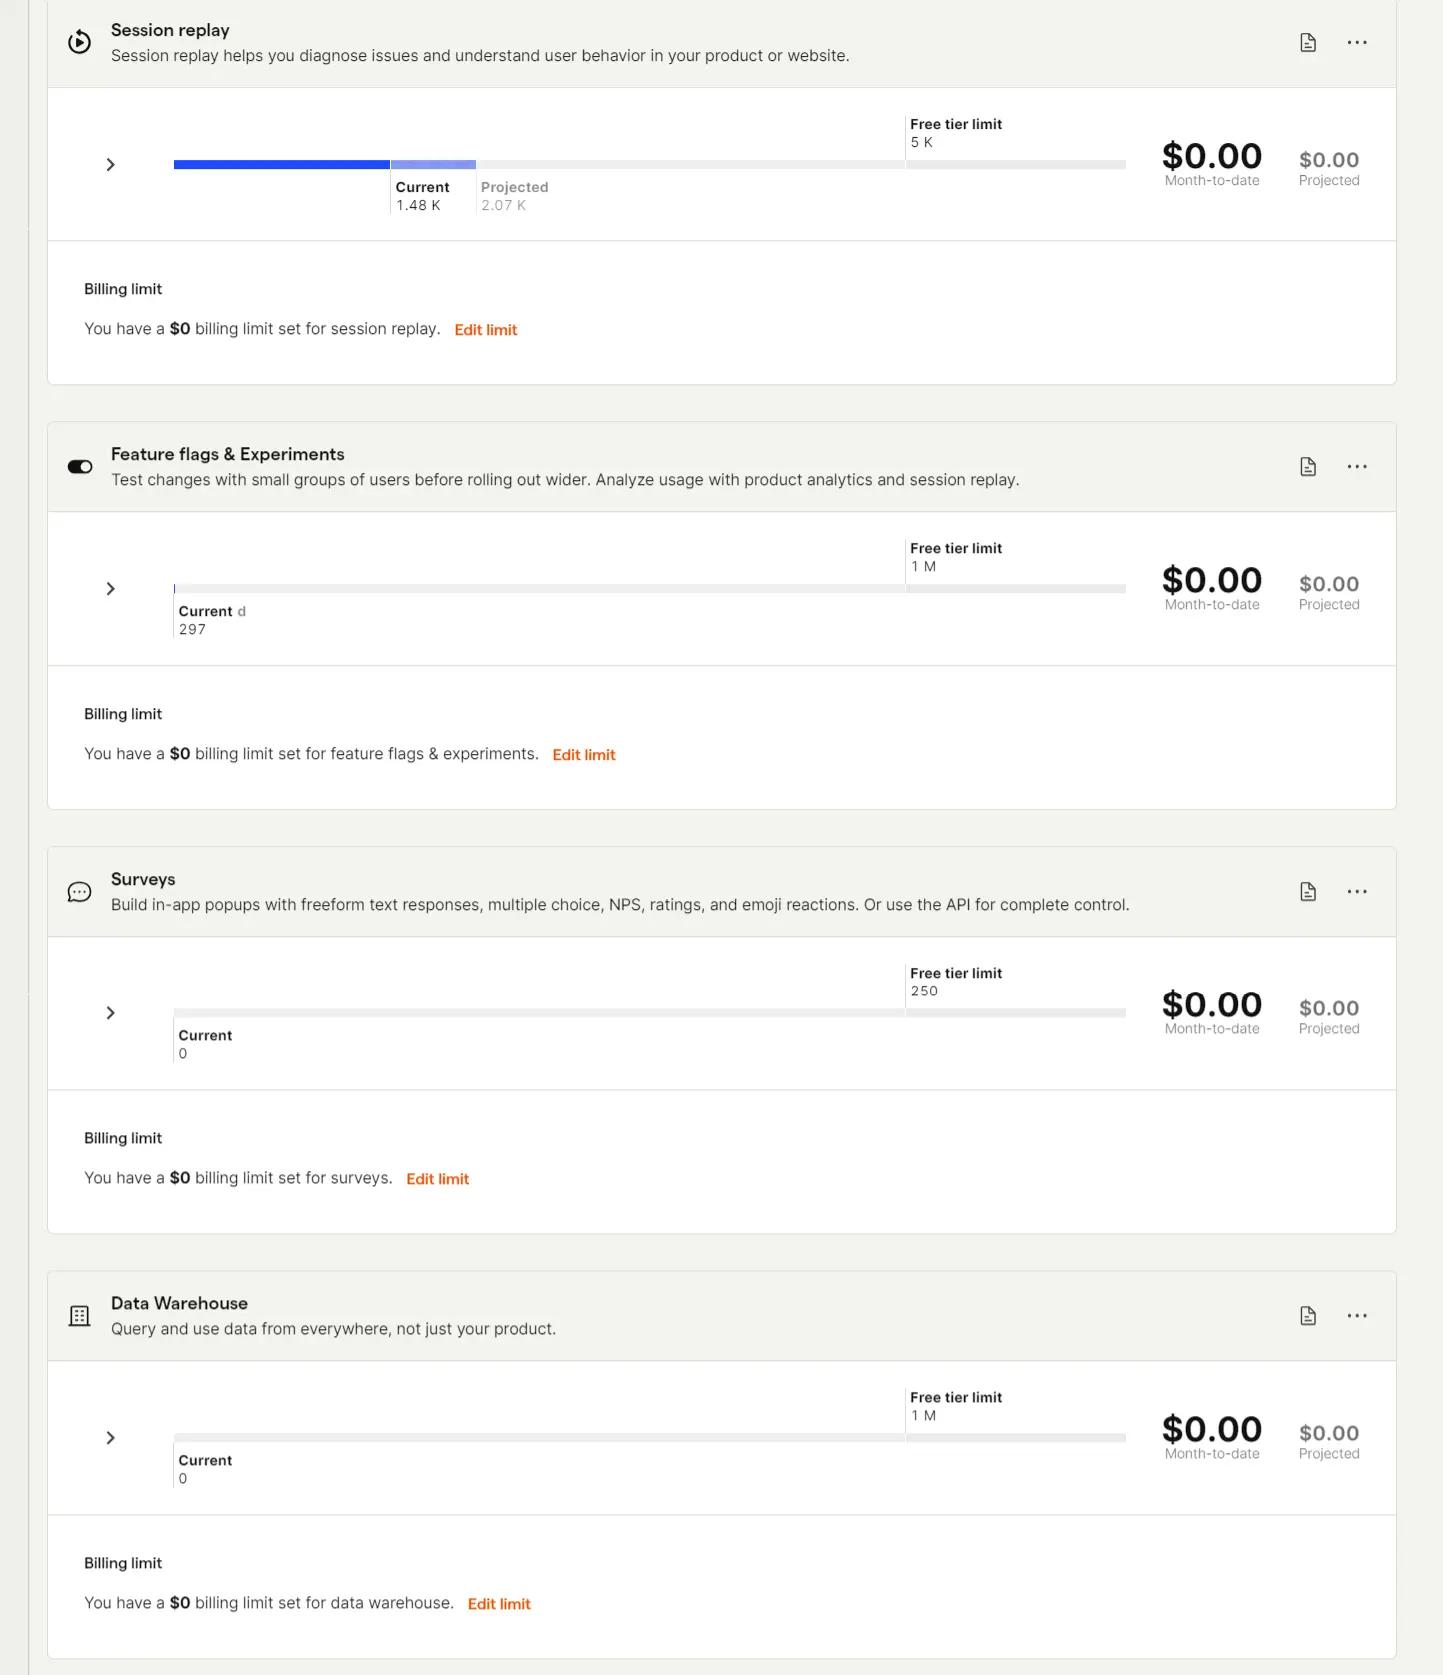
Step 5: Set Up Billing and Avoid Surprises
One error keeps popping up. People start using PostHog, then ignore the cost settings. Before long, surprise fees show up. It happens because limits aren’t set early.
Start at Settings, then head into Billing – slide every limit down to nothing. That shift means alerts hit first, before any charges apply.
Here is a tip worth trying. Begin with just a little piece first. When patterns in attendance and movement become clear, shifts in strategy come naturally. Changes fit better once real activity shows the way.

Final Thoughts
Creating a PostHog account is about setting the stage for meaningful insights. Done right, you’ll have a powerful analytics setup that fuels smarter decisions and better results.
If you’re ready to take your analytics game to the next level, start with these steps and make PostHog work for you; not the other way around.
Frequently asked qusetions
How many PostHog projects should I create for my business?
Use one project per product or site where you need clean, separate analytics.
Good reasons to split into multiple projects:
Different products/brands with different audiences.
Separate environments where you don’t want data mixed (e.g., production vs internal tools).
Bad reason: creating a new project for every minor landing page; that just fragments your data.
Should I start with PostHog Cloud or go straight to self-hosting?
In most cases, start with PostHog Cloud:
Faster to set up.
No infrastructure or DevOps overhead.
You can validate your event model and dashboards quickly.
Self-hosting makes sense only if you have strict data control requirements, a DevOps team, or need deep customization and are prepared to maintain it long term.
How do I choose between the US and EU PostHog Cloud regions?
Pick the region based on where most of your users are and your regulatory requirements:
If you operate mainly in the EU or have strict EU data residency expectations, use the EU region.
If your audience and company are primarily US-based and you don’t have EU data residency constraints, the US region is fine.
Once chosen and in use, moving regions isn’t trivial, so decide early.
Can I move my PostHog project from Cloud to self-hosted later?
Yes, you can move from Cloud to self-hosted, but it’s not a one-click toggle. You’ll:
Spin up a self-hosted instance.
Recreate your project + settings.
Point your tracking (snippet, SDKs, backend calls) to the new instance.
Treat it as a migration project, not a quick switch. That’s why testing on Cloud first is useful.
Who should be the owner of the PostHog organization in a company?
Ideally, the company, not a random freelancer:
Use a shared email domain (e.g., [email protected]) or SSO.
Make sure at least one technical owner (dev/analytics engineer) and one business owner (product/marketing lead) have admin rights.
You don’t want your only org owner to be a contractor who leaves.
How should agencies or freelancers structure PostHog for multiple clients?
Best practice:
One organization per client (owned by the client).
You join their organization as a collaborator.
If you must host everything under your agency org, use one project per client, but that makes client ownership and handoff trickier later.
What should I configure during PostHog onboarding to avoid messy data later?
At minimum:
Correct region (US/EU).
Clear project name that matches the product/site.
Initial install of the tracking snippet / SDK.
Early decisions on how you’ll identify users (anonymous vs logged-in) and how you’ll name key events.
These basics prevent you from renaming and re-mapping everything later when the data is already messy.
Which events and properties should I define first in a new PostHog project?
Start with business outcomes, not vanity actions:
For SaaS:
signup_completed,subscription_started,plan_upgraded.For eCom:
add_to_cart,checkout_started,order_completed.For lead gen:
lead_submitted,call_booked,deal_won.
Then add a small set of properties like plan_type, channel, country, or device_type that you actually plan to segment by.
How do I prevent internal traffic from polluting my PostHog analytics?
Use the product analytics settings to:
Exclude email domains for your team (e.g., *@yourcompany.com).
Optionally filter by IP range or tag staff users with a property like
internal_user = trueand exclude them in your reports.
Do this early, or all your “top users” will just be your own team testing the product.
Why do timezone and week-start settings matter in PostHog?
If your PostHog timezone doesn’t match your ad platforms or your primary markets, your daily/weekly numbers won’t line up.
Misaligned timezones cause:
Confusing discrepancies between Meta/Google Ads and PostHog.
Weekly trends that start on the wrong day for your business context.
Set timezone and week start to match your main reporting source from day one.
How does PostHog billing work, and what can trigger unexpected charges?
PostHog pricing is primarily tied to event volume and usage of advanced features (like experiments or higher data volumes). You can easily shoot past free or assumed limits if:
You over-instrument and track every minor click.
Bots or internal environments send events.
Traffic scales faster than expected.
That’s why you should set up usage limits and notifications in billing as soon as you open the account.
What limits should I set in PostHog billing when starting out?
Early on, set hard limits at or close to zero and turn on notifications so:
You get warned before exceeding your free tier.
You can decide whether to upgrade, reduce event volume, or filter noisy events.
Then, once you understand your real monthly event volume, increase limits deliberately instead of guessing.
When does it make sense to upgrade from the free PostHog plan?
Upgrade when one of these is true:
You consistently hit the free event cap and are forced to choose between losing data or paying.
You need heavier features (e.g., larger session replay quotas, more experimentation, or higher data retention).
PostHog has become core to product and CRO decisions, and losing visibility would hurt revenue more than the subscription cost.
Who should I invite to my PostHog workspace, and with what permissions?
At a minimum:
Engineers / implementers – need enough access to manage events and integrations.
Product managers / marketers – need access to dashboards, funnels, and replays.
Leadership – usually read-only or viewer access to key dashboards.
Don’t give everyone admin rights. Keep admin access to the small group responsible for tracking integrity and billing.