
Creating a PostHog account is easy. Creating one that stays clean, useful, and affordable takes a little more care.
Most messy PostHog setups do not fail because the tool is bad. They fail because the account was created quickly, the wrong region was chosen, projects were split badly, internal traffic polluted the data, billing limits were ignored, and nobody agreed on which events actually mattered.
This guide walks through the setup in the right order: account, region, organization, project, onboarding, tracking, product analytics settings, billing limits, and team access.
By the end, you should have a PostHog workspace that is ready for useful analytics, session recordings, experiments, and CRO decisions.
What You Need Before You Start
Before signing up, decide:
- Who should own the PostHog organization.
- Whether you need the US or EU Cloud region.
- Which website, app, or product you want to track first.
- Whether this is for your own company, a client, or an agency-managed workspace.
- Which platform you will install PostHog on, such as WordPress, Shopify, ClickFunnels, a SaaS app, or a custom website.
- Which conversion events matter most.
- Who needs admin access and who only needs viewer access.
Do this before you click through onboarding. A few early decisions can save a lot of cleanup later.
Step 1: Choose PostHog Cloud or Self-Hosted
For most teams, start with PostHog Cloud.
PostHog Cloud is faster to set up, does not require infrastructure work, and lets you validate your tracking plan before you commit to a more complex architecture.
Self-hosting can make sense when:
- You have strict data control requirements.
- You have a technical team ready to maintain the infrastructure.
- You need deep customization.
- You already know PostHog will become a long-term core analytics system.
If you are just starting, Cloud is usually the cleaner path. You can learn what events, dashboards, funnels, and recordings you actually need before taking on the operational work of self-hosting.
Step 2: Choose the Right PostHog Cloud Region
PostHog Cloud is available in US and EU regions.
Use:
- US Cloud if your company and audience are mainly US-based and you do not have EU data residency requirements.
- EU Cloud if you operate mainly in Europe, serve EU users heavily, or have stricter EU data residency expectations.
PostHog’s pricing page lists Cloud regions as US Virginia and EU Frankfurt. Choose carefully because changing regions later is not a casual toggle. Once events, dashboards, integrations, and billing are active, moving regions becomes a migration project.
Use these signup paths:
- US Cloud:
https://us.posthog.com - EU Cloud:
https://eu.posthog.com
If you are an agency, choose the region based on the client’s requirements, not your own convenience.
Step 3: Create the Account With the Right Owner
Create the account using an email that will still make sense later.
For a company, avoid creating the only owner account under a freelancer’s personal email or one employee’s temporary inbox.
Better options:
- Use a company-owned email.
- Use SSO if available.
- Make sure at least one technical owner and one business owner have admin access.
- Add a backup admin early.
The owner of the PostHog organization should be the company or client that owns the data. Contractors and agencies can be invited as collaborators.
That makes handoff much easier when the project changes hands.
Step 4: Create the Organization
In PostHog, the organization is the top-level workspace.
Think of it as the company, client, or business entity that owns the data.
Examples:
99Ways
Client Name
Example SaaS Inc.
Example Ecommerce Brand
Use one organization per business or client when possible.
For agencies, the cleanest setup is:
One client = one PostHog organization owned by that client
You can join the client’s organization as a collaborator. This avoids awkward ownership problems later.
Step 5: Create the First Project
A PostHog project is where events, dashboards, feature flags, experiments, and settings live.
Use one project for one product, site, app, or closely connected customer journey.
Good project examples:
Main Website
Shopify Store
SaaS App
Marketing Website + Web App
Client Storefront
Avoid creating a new project for every landing page. That fragments the data and makes reporting harder.
PostHog’s install documentation recommends grouping multiple customer-facing products in one project when they are part of the same user journey, such as a marketing website, mobile app, and web app. That makes it easier to follow users across the full path from visit to signup to product usage.
Split projects only when the data should stay separate.
Good reasons to create separate projects:
- Different brands.
- Different clients.
- Production and internal tools that should not mix.
- Different products with different users and reporting needs.
Bad reasons:
- One project for each page.
- One project for each short campaign.
- One project for each team member’s experiment.
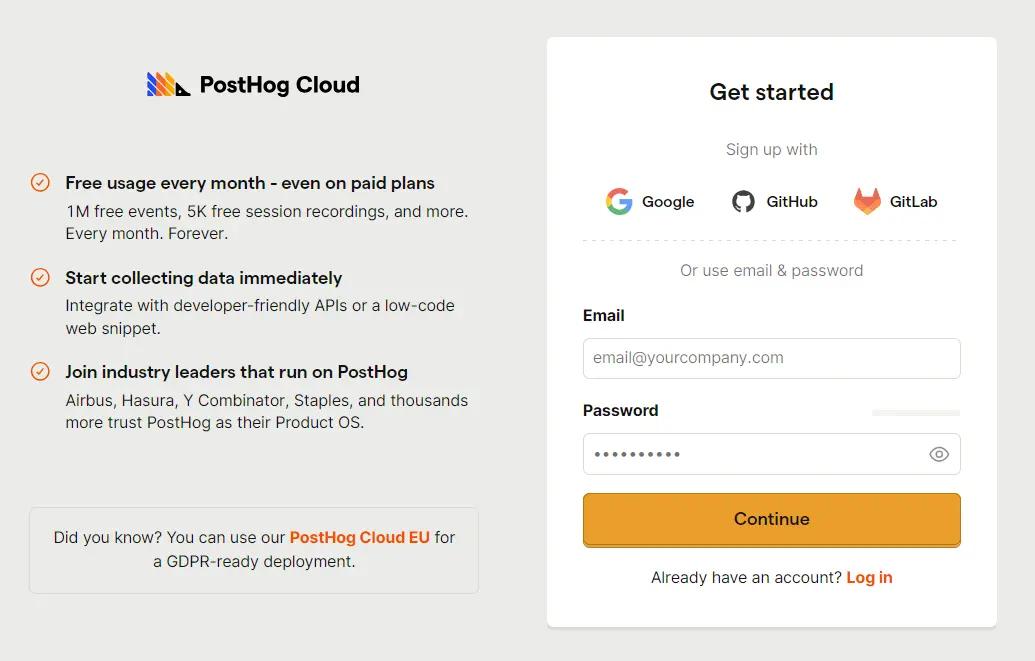
Step 6: Complete Product Analytics Onboarding
PostHog onboarding usually asks you to install tracking, configure analytics, connect data sources, pick a plan, and invite teammates.
Move through it intentionally.
Install the Tracking Snippet or SDK
PostHog gives you a web snippet or framework-specific SDK instructions.
For a simple website, you may use the JavaScript snippet. For an app, use the relevant library or framework guide.
PostHog’s install docs also mention the setup wizard:
npx @posthog/wizard@latest
Use the wizard when you are working in a supported app codebase and want guided setup.
For platforms like WordPress, Shopify, ClickFunnels, Webflow, or WooCommerce, use platform-specific guidance so the snippet is placed in the right location.
Confirm the API Host Matches Your Region
Your snippet should match your PostHog Cloud region.
Examples:
US: https://us.i.posthog.com
EU: https://eu.i.posthog.com
If the host and account region do not match, tracking may fail or data may be sent to the wrong place.
Decide What to Track First
Do not start by tracking everything.
Start with business outcomes:
For SaaS:
signup_completed
subscription_started
plan_upgraded
feature_used
For ecommerce:
product_viewed
add_to_cart
checkout_started
order_completed
In lead generation:
lead_submitted
call_booked
quiz_completed
deal_won
Then add properties you will actually use for segmentation:
plan_type
traffic_source
utm_campaign
country
device_type
customer_type
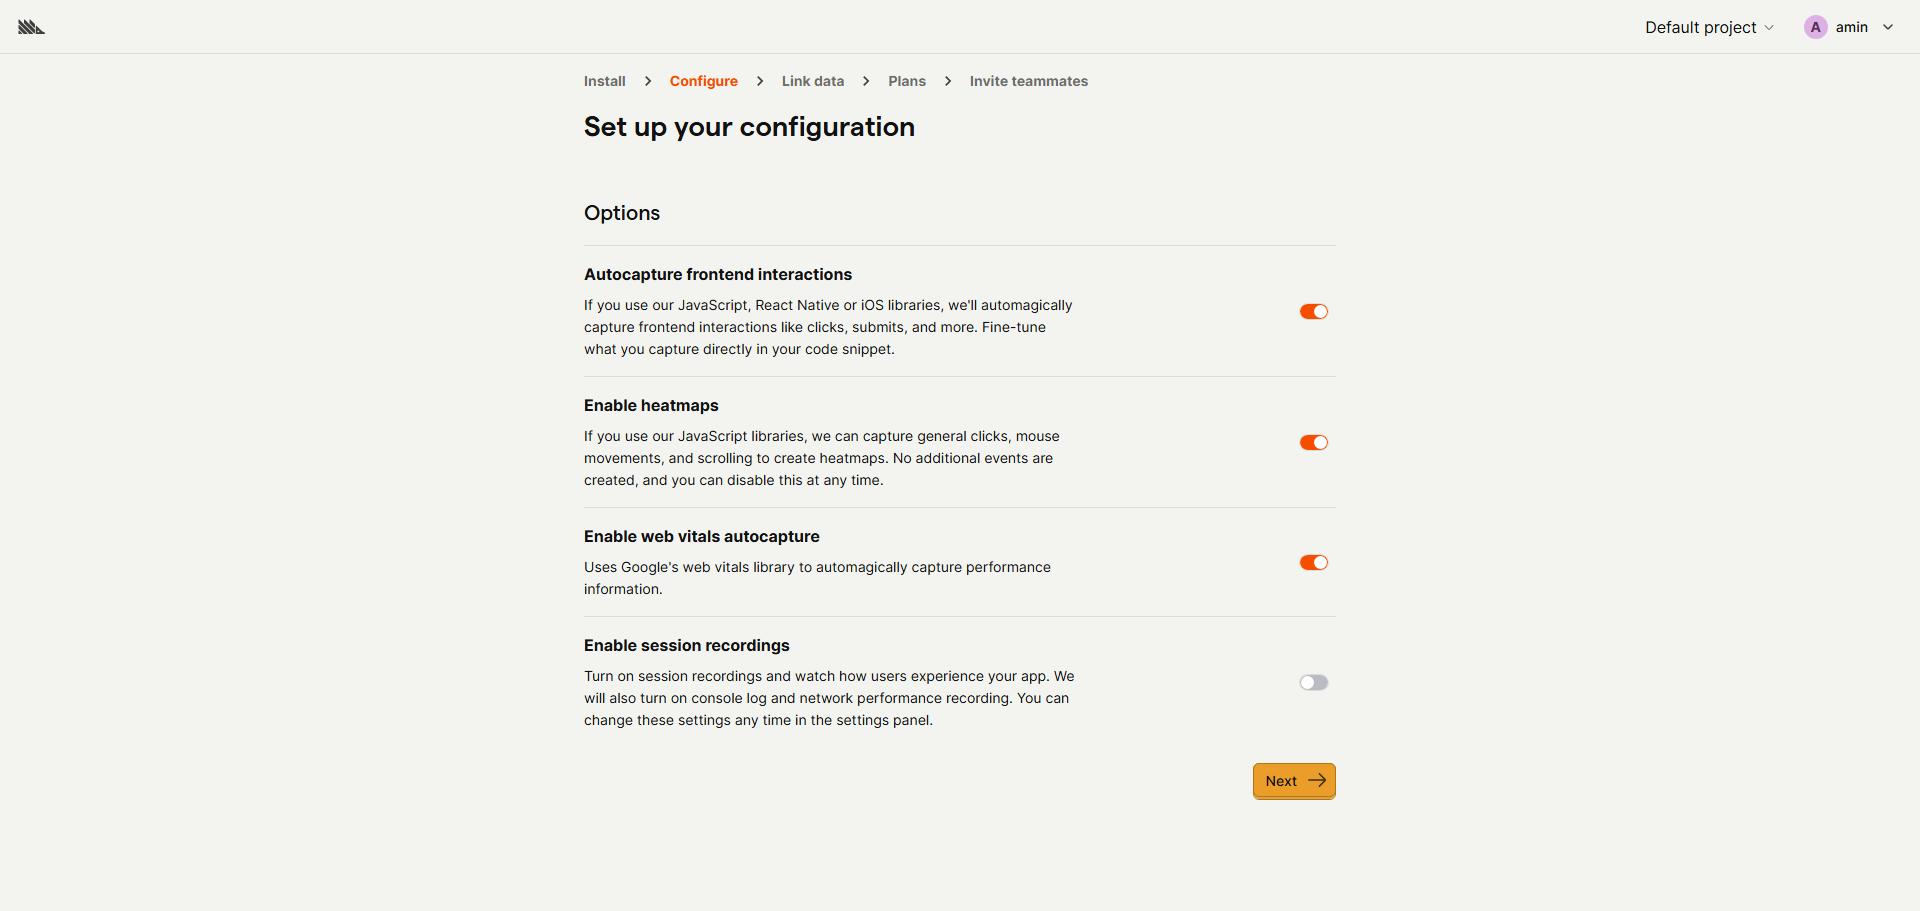
Step 7: Configure Product Analytics Settings
Before you start reporting, configure the settings that affect how data is interpreted.

Set the Timezone
Set the timezone to match your main reporting context.
If your ads, revenue reporting, and team reporting are based in one timezone, use that. Misaligned timezones create confusing differences between PostHog, ad platforms, CRM reports, and ecommerce dashboards.
Set the Week Start
Choose the week start that matches your business reporting.
For many teams this is Monday. For others, especially in US reporting workflows, it may be Sunday.
The exact choice matters less than consistency across your reports.
Exclude Internal Traffic
Filter out your own team as early as possible.
Options include:
- Excluding company email domains.
- Filtering office IP ranges.
- Marking staff users with a property such as
internal_user = true. - Excluding staging and test environments.
Internal traffic can ruin early reporting. If your team keeps testing the product, your top users, top sessions, and conversion paths may just reflect your own setup activity.
Step 8: Set Up Billing Limits Before Scaling
PostHog has a generous free tier, but usage-based products can still create surprise bills if you do not set limits.
PostHog’s pricing page says the free plan includes no credit card requirement, one project, one-year data retention, unlimited team members, and monthly free usage across products such as analytics events, session recordings, feature flag requests, exceptions, surveys, data warehouse rows, and more.
It also says that if usage goes beyond the free tier, PostHog offers usage-based pricing and lets you set billing limits for each product so you do not get an unexpected bill.
Go to:
Settings -> Billing
Then review limits for products such as:
- Product Analytics.
- Session Replay.
- Feature Flags.
- Experiments.
- Error Tracking.
- Surveys.
- Data Warehouse.
- Data Pipelines.
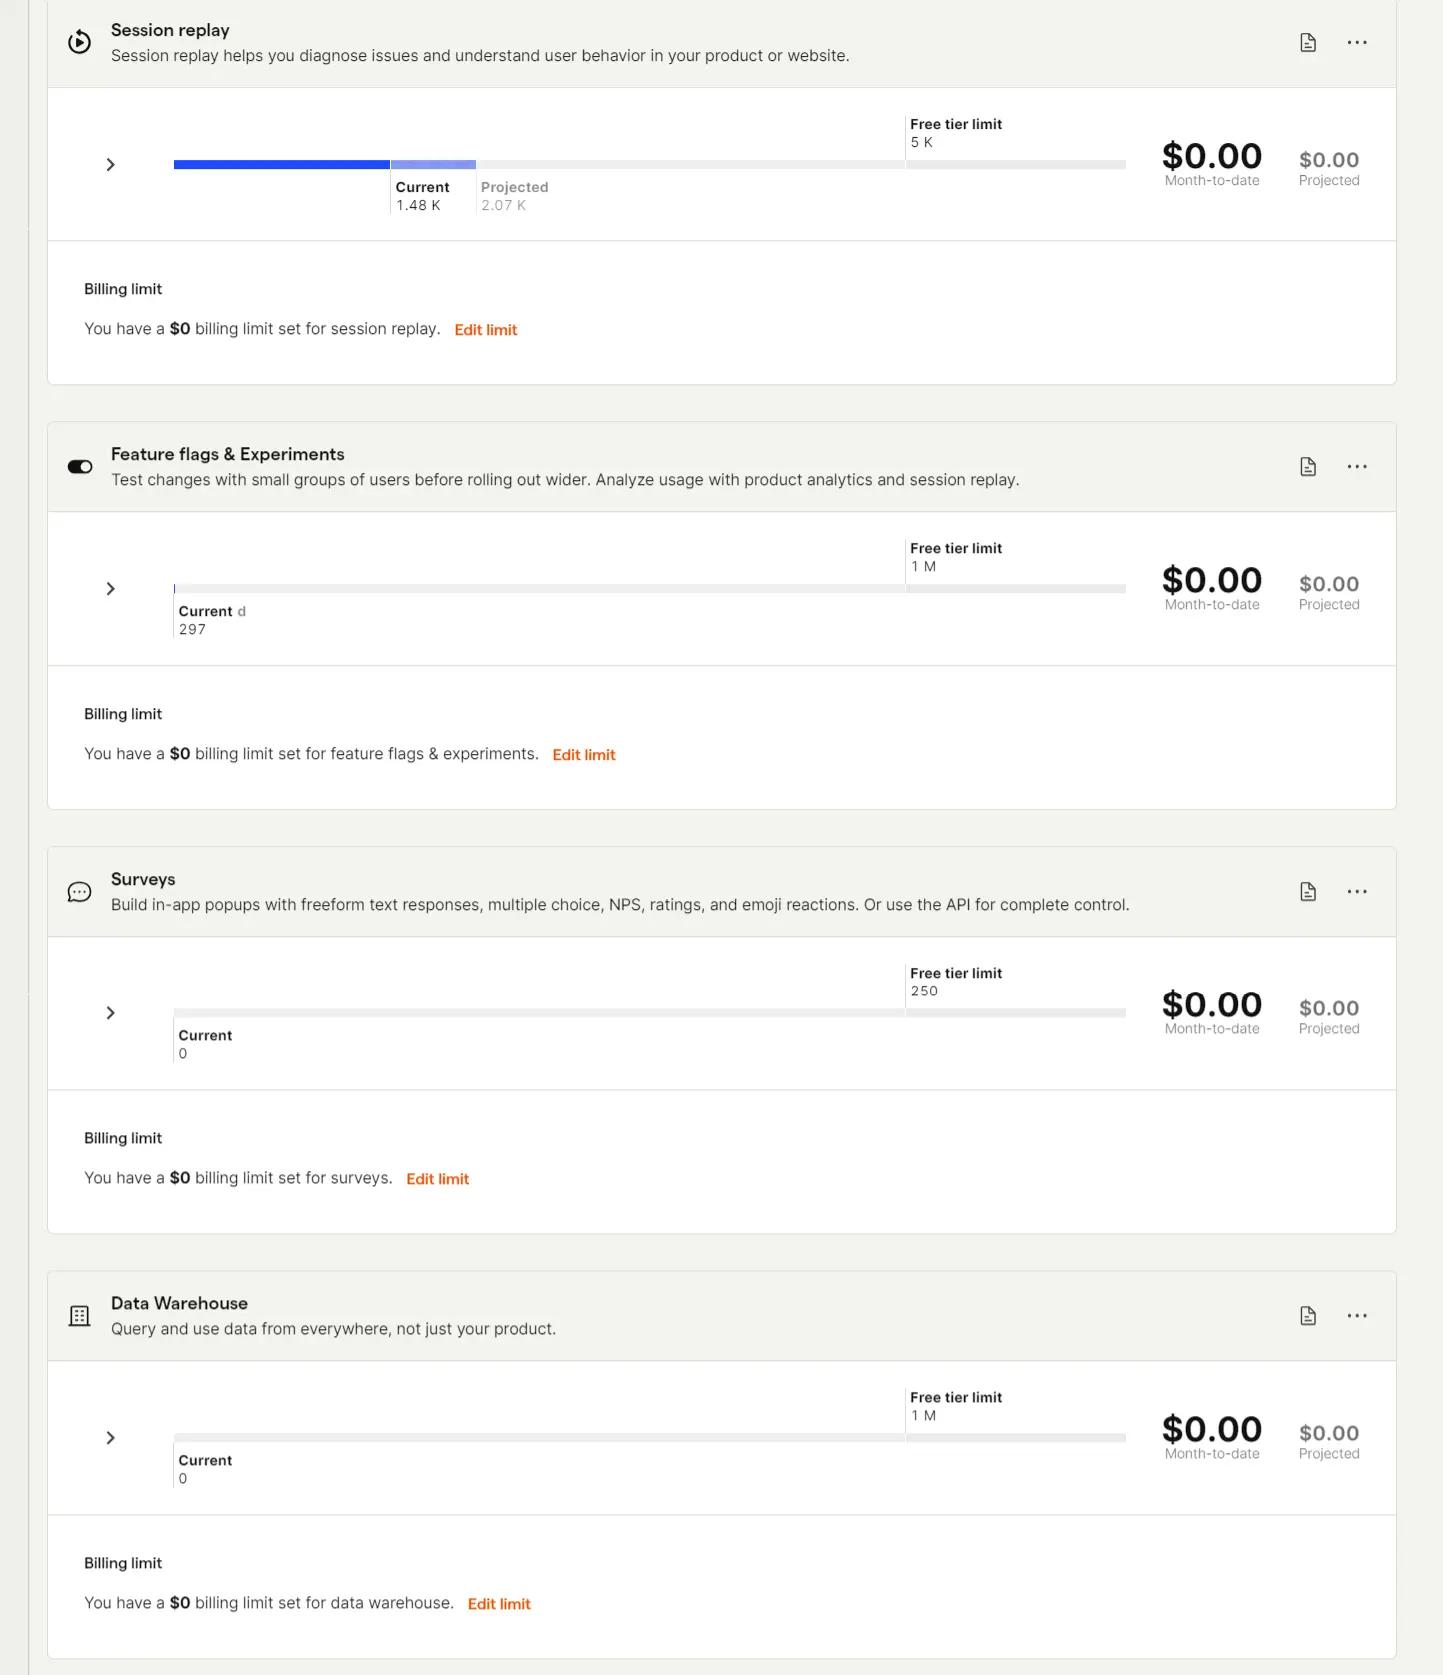
When starting, keep limits conservative. You can raise them later once you understand your real traffic and event volume.
Usage can grow quickly if:
- Autocapture is noisy.
- Bots hit your site.
- Internal testing sends too many events.
- Session replay is enabled for high traffic.
- Feature flags are evaluated on every page.
- Multiple environments send production-like data.
Set alerts and limits before the data volume surprises you.
Step 9: Invite the Right Teammates
PostHog is more useful when the right people can see the data.
Invite:
- Engineers or implementers who manage tracking.
- Marketers who use campaign and conversion reports.
- CRO specialists who analyze funnels and recordings.
- Product managers who inspect feature usage.
- Leadership users who need dashboard visibility.
Do not give everyone admin access.
Use admin access for people responsible for:
- Billing.
- Project settings.
- Event definitions.
- Integrations.
- Feature flags.
- Experiments.
- Data governance.
Everyone else can usually start with viewer or member permissions.
Step 10: Verify the Setup
After the account, organization, project, and snippet are ready, test before trusting the data.
Open your site or app and perform a safe test journey.
Then check PostHog:
- A
$pageviewappears. - The event URL is correct.
- The region and API host are correct.
- The session appears in Activity.
- The visitor is not incorrectly marked as a real lead or customer.
- Important actions are captured.
- Internal test traffic is excluded or clearly labeled.
- Billing usage looks reasonable.
If you plan to use session replay, feature flags, or experiments, verify those features separately. A working pageview does not prove the rest of the setup is ready.
Common Mistakes to Avoid
Choosing the wrong Cloud region
Pick US or EU based on users, compliance, and data residency needs. Changing later is a migration.
Letting a contractor own the organization
The company or client should own the organization. Contractors can be collaborators.
Creating too many projects
Use one project for connected customer journeys. Too many projects make the data fragmented.
Installing tracking before defining events
The snippet is only the start. Decide which events and properties matter before building dashboards.
Forgetting internal traffic filters
Your own team can quickly become the most active “users” in PostHog. Filter or label internal activity early.
Ignoring billing settings
Set limits and alerts while usage is small. It is easier than cleaning up surprise volume later.
Inviting everyone as admin
Too many admins increases the risk of broken settings, accidental billing changes, and messy event definitions.

Why This Matters for CRO
PostHog is valuable because it connects behavior to outcomes.
With a clean setup, you can see:
- Which traffic sources bring useful visitors.
- Where users drop off.
- Which sessions show friction.
- Which pages or features drive conversion.
- Which experiments improve revenue or lead quality.
- Which customer segments behave differently.
But if the account setup is messy, those insights become harder to trust.
The right region, project structure, tracking plan, settings, billing limits, and permissions turn PostHog into a usable decision system instead of another noisy dashboard.
Frequently asked questions
Should I use PostHog Cloud or self-hosted?
Most teams should start with PostHog Cloud because it is faster and easier to maintain. Self-hosting makes sense when you have strict data control needs and a team ready to manage infrastructure.
Should I choose the US or EU PostHog region?
Choose the region based on your users, company requirements, and data residency expectations. Use EU Cloud for EU-heavy or EU-sensitive setups. Use US Cloud when the business and audience are mainly US-based.
Can I change PostHog regions later?
Not easily. Treat a region change as a migration project because you may need to recreate settings, update tracking hosts, and move or rebuild data workflows.
How many PostHog projects should I create?
Use one project per product, site, app, or connected customer journey. Split projects only when the data truly needs to stay separate.
Should agencies create one PostHog organization for all clients?
Usually no. The cleaner setup is one organization per client, owned by the client, with the agency invited as a collaborator.
Which events should I define first?
Start with business outcomes: signups, purchases, leads, bookings, checkout starts, add-to-cart events, subscription starts, and upgrades. Add properties only when you plan to use them for filtering or segmentation.
How do I prevent internal traffic from polluting PostHog?
Exclude company email domains, office IPs, staging environments, or users tagged with an internal-user property.
Why do timezone settings matter?
Timezone settings affect daily and weekly reporting. If PostHog uses a different timezone than your ads, CRM, or ecommerce reports, numbers may appear mismatched.
Can PostHog create surprise bills?
It can if usage grows beyond the free tier and billing limits are not configured. Set product-level billing limits and alerts early.
When should I upgrade from the free PostHog plan?
Upgrade when you need more projects, longer retention, higher usage limits, email support, or when PostHog has become important enough that losing data would cost more than the subscription.
Who should have admin access?
Give admin access only to people responsible for billing, integrations, tracking governance, project settings, feature flags, or experiments. Most users can start with lower permissions.