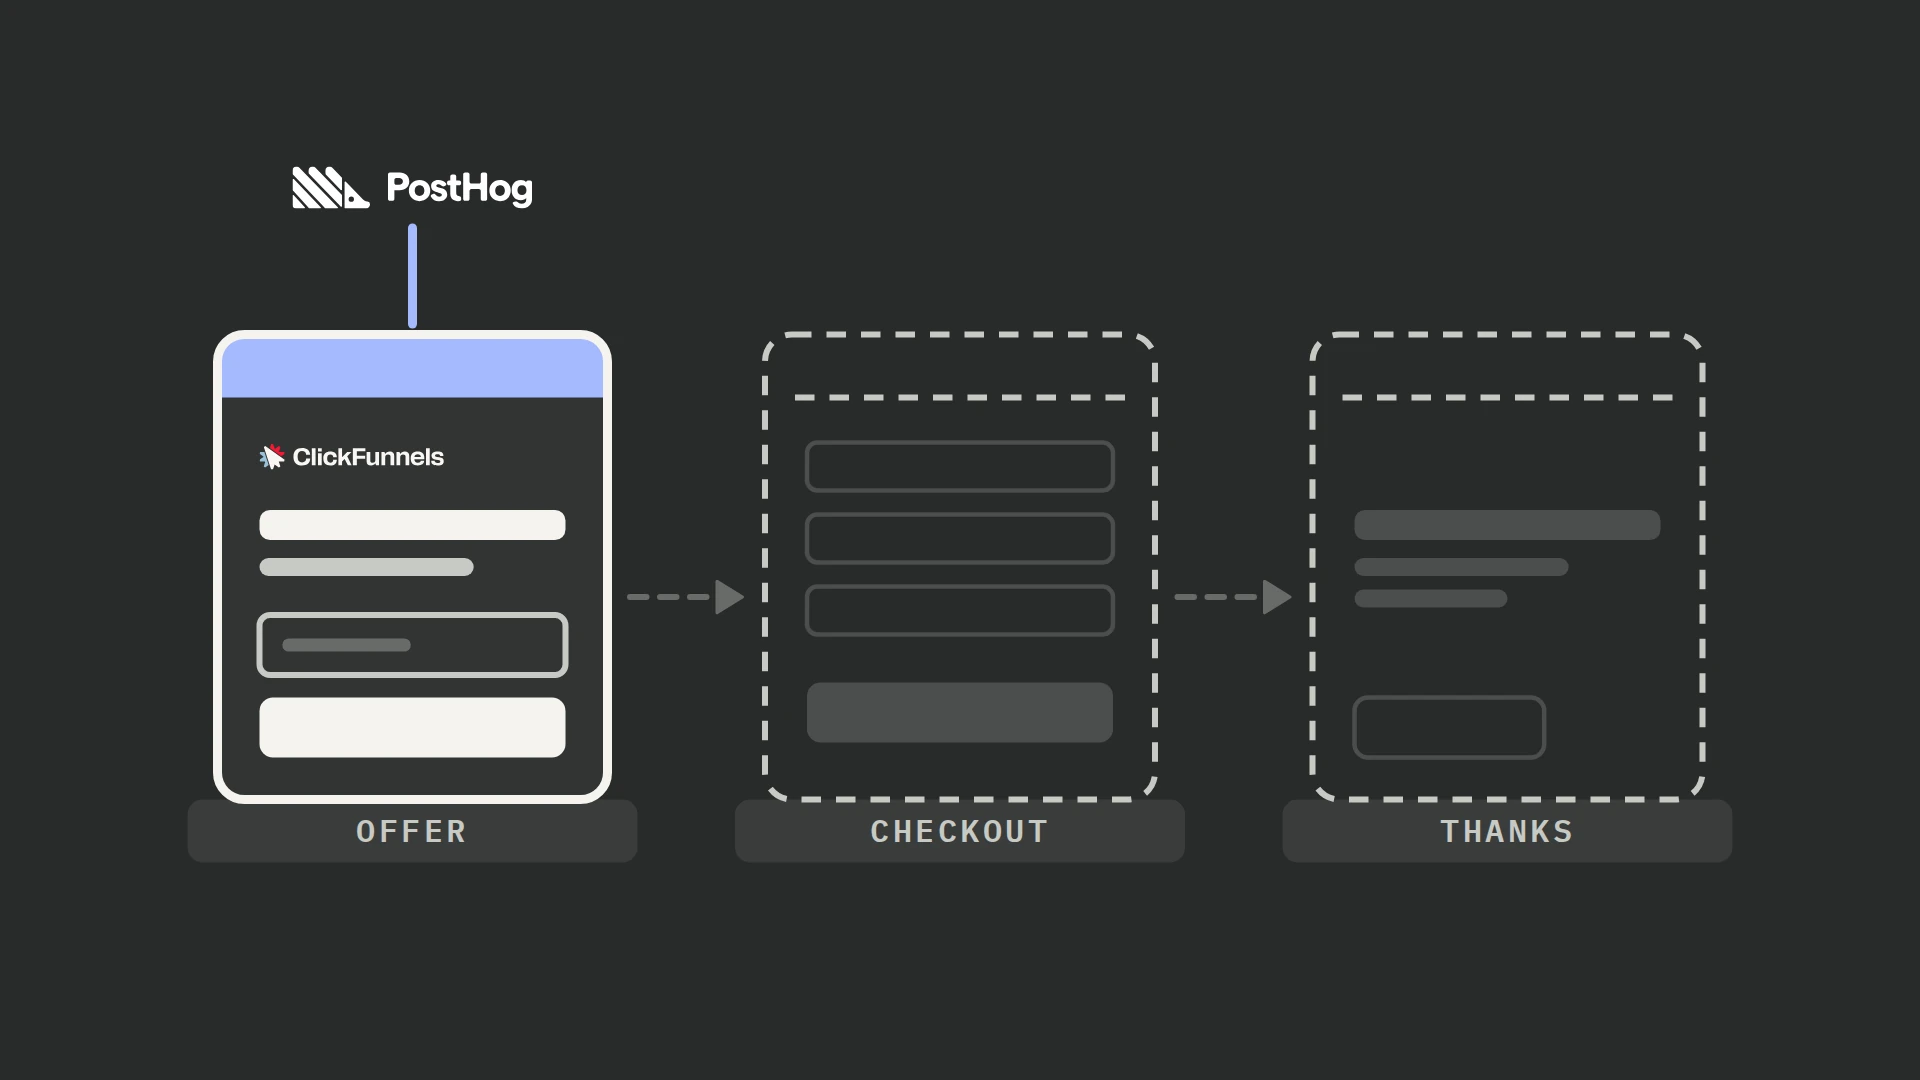
Build the control and test versions on a copy of the ClickFunnels funnel step. Hide the treatments and add the PostHog Page Experiments runner to the footer, then preview every version. Once they work, move the changes to the live step, check them there, and test a real PostHog assignment and conversion with the flag restricted to QA visitors. Then launch. Use our PostHog experiment guide to plan targeting, exposure and the decision.
Requirements:
- An active PostHog project.
- The PostHog browser script installed on ClickFunnels, including the step where the conversion happens.
- Access to clone and edit the intended funnel step, add CSS, and insert footer code.
- One hypothesis, exact feature flag and variant keys, and a verified successful opt-in or other business event.
If a later step uses another hostname, check that the visitor’s identity carries across it. A pageview from each domain does not tell you whether PostHog recognizes them as the same person.
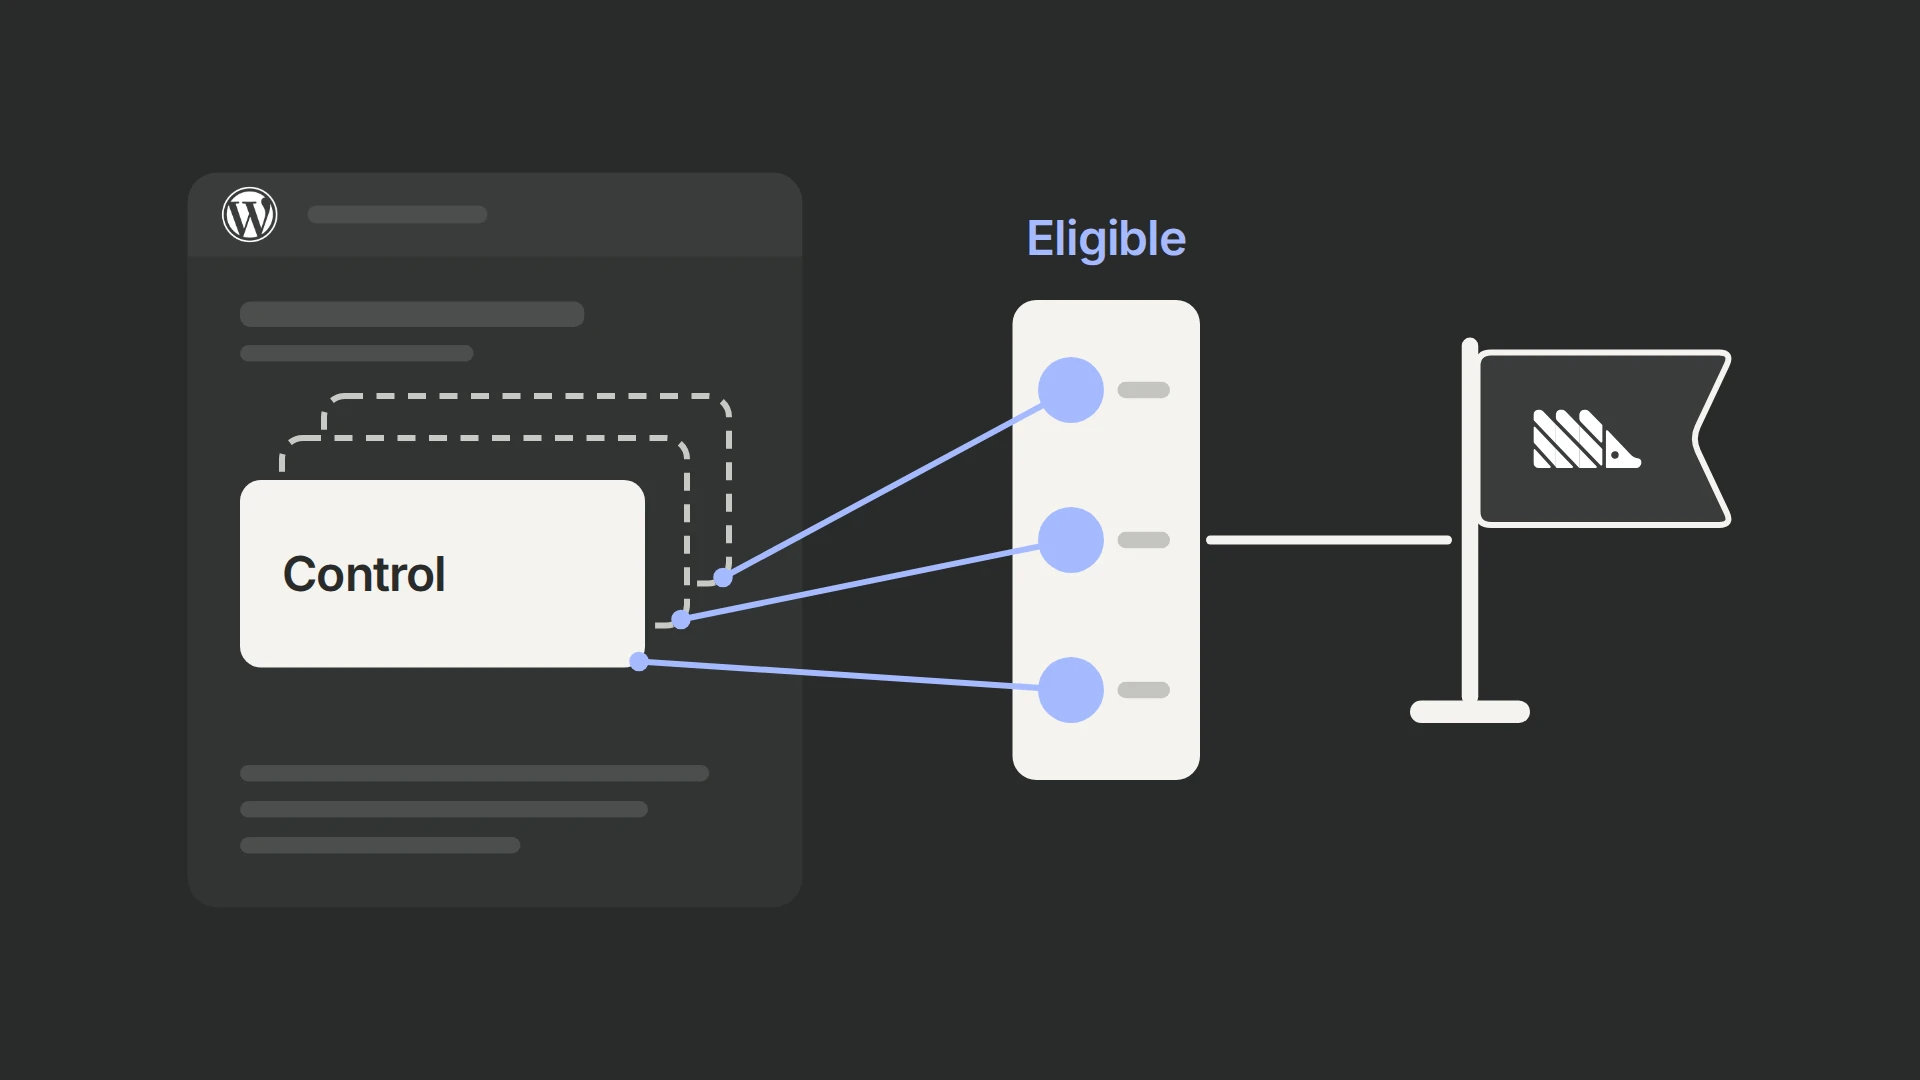
This example uses separate ClickFunnels elements for control and two treatments. For a simple copy or style change, the runner can update an existing element directly without duplicating it. For the same implementation pattern in another page builder, see the WordPress A/B testing guide.
ClickFunnels 2.0’s built-in split test may be enough if you want to compare two pages using the pageviews, opt-ins, orders and sales shown on their cards. PostHog is useful when you need to measure a conversion on a later funnel step or a later purchase, choose when someone counts as exposed, or compare results by segment. Use one system to assign visitors to variants.
For small text, CSS, or HTML edits on a server-rendered page, PostHog’s no-code web experiments are another option: build the changes in the toolbar and set disable_web_experiments: false in your PostHog snippet. The runner suits prebuilt elements, several coordinated changes, eligibility checks, and repeatable URL previews. Both approaches need extra integration if the page later replaces the edited elements.
Step 1: Duplicate the Page You Want to Test
ClickFunnels Classic: Click Clone Funnel Step on the page you want to test. After it reloads, open the Publishing tab and give the copy a unique name. Click Update Funnel Step to save. Build the test on this copy before editing the live page.
ClickFunnels 2.0: Open Funnels and select your funnel. On the step’s three-dot menu, choose Clone Page. (+) Open the clone’s ⋮ → Settings, give it a distinct Name and QA URL, then click Submit.
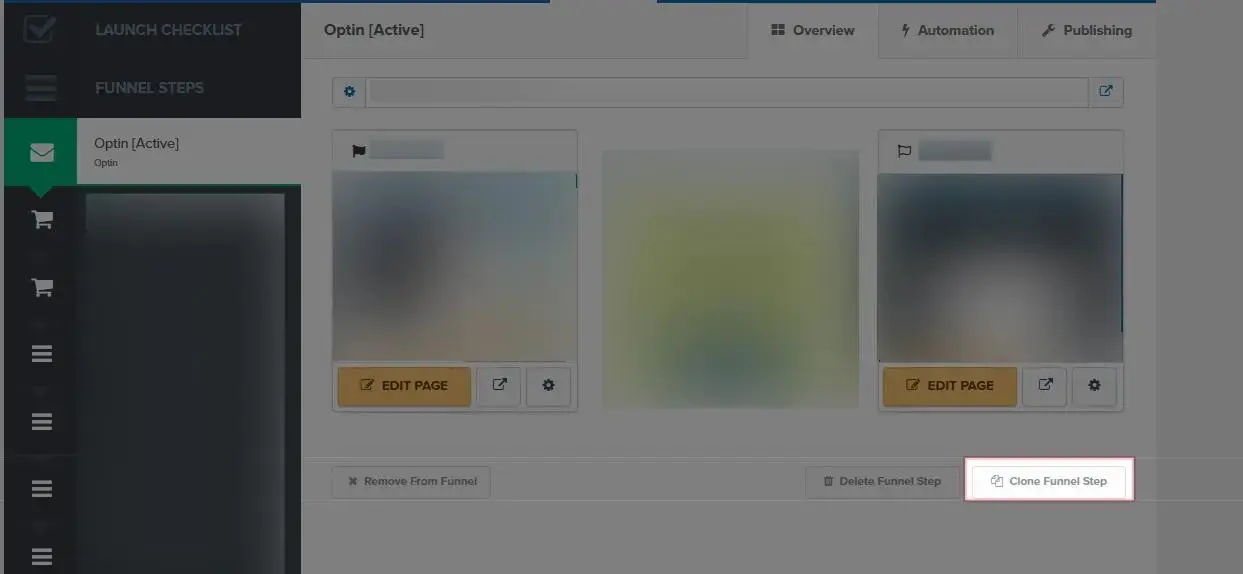
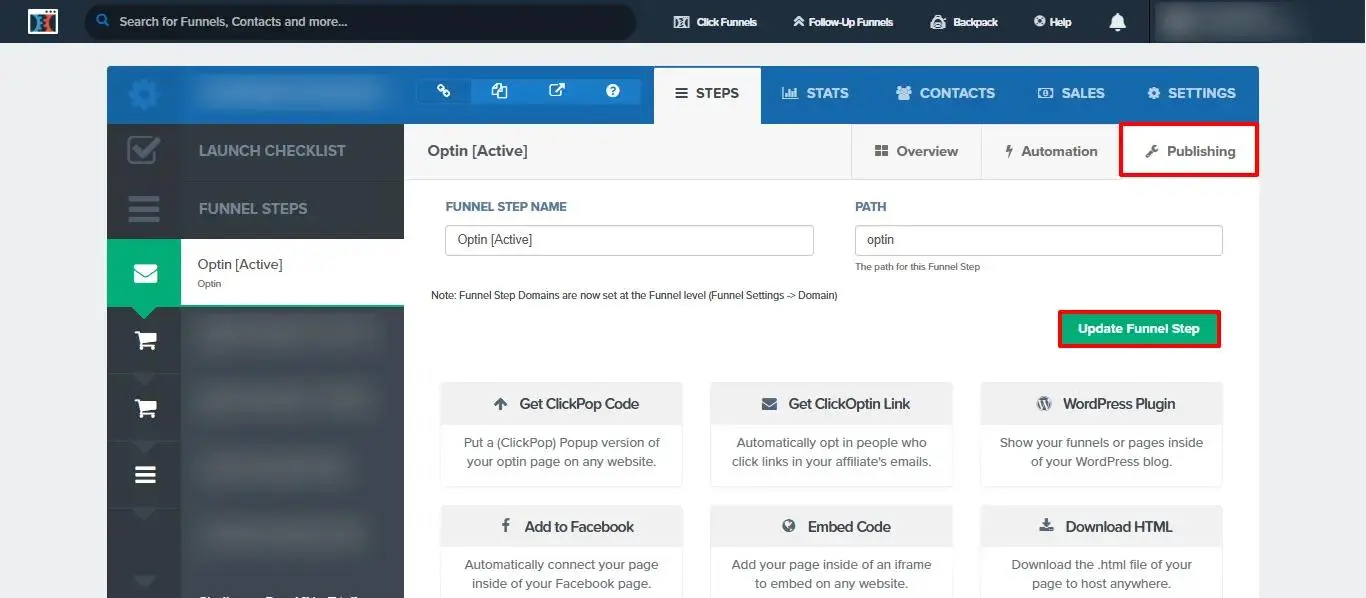
Check the funnel’s step order after cloning; do not assume the clone is outside the live journey. In 2.0, the reorder handle on the left of each step card changes its position. (+) Test from the preceding step and confirm visitors still reach the intended live page and its next step.
Step 2: Create Your Experiment in PostHog
- Log into PostHog.
- From the left sidebar, go to Experiments and click New experiment.
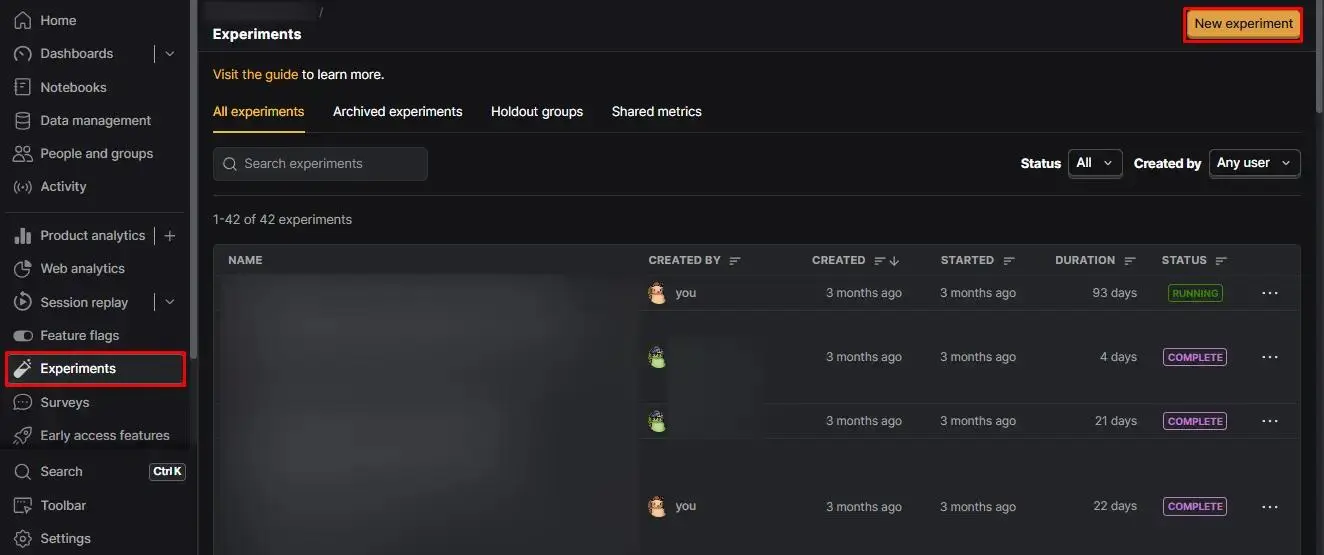
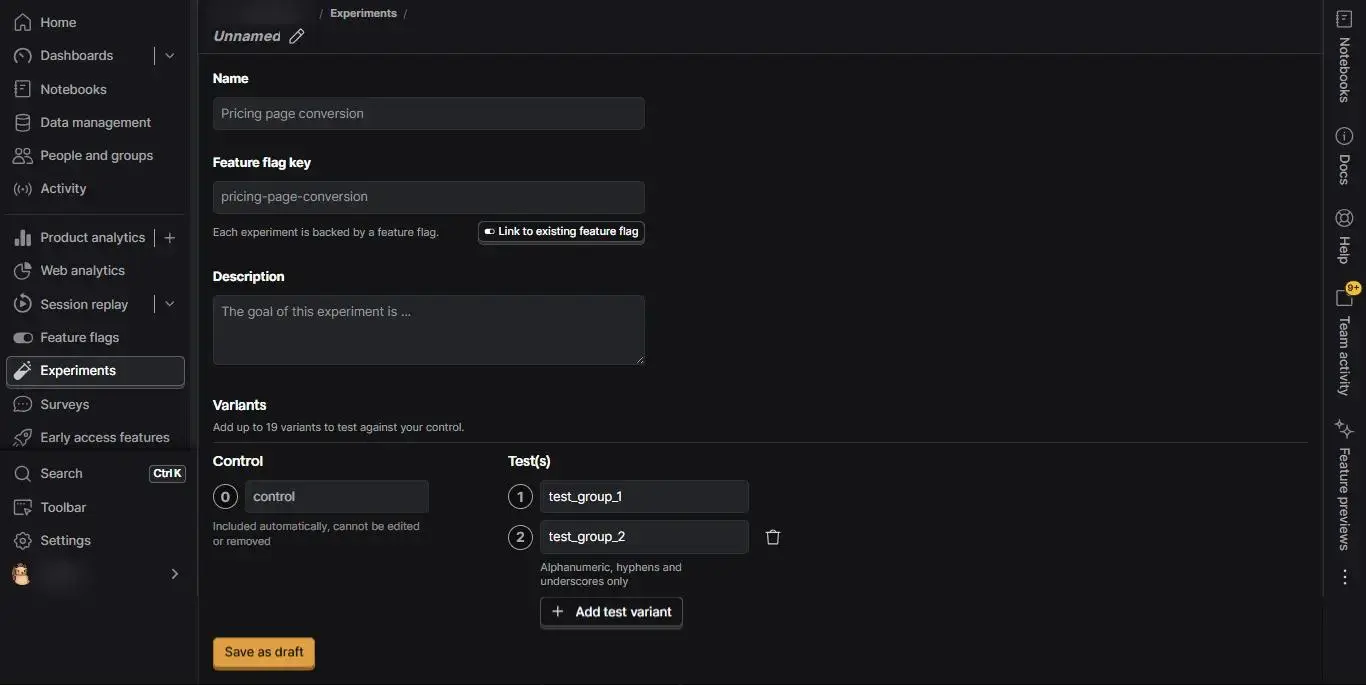
In Description, name the experiment and write the hypothesis.
We use this general format for experiment names:
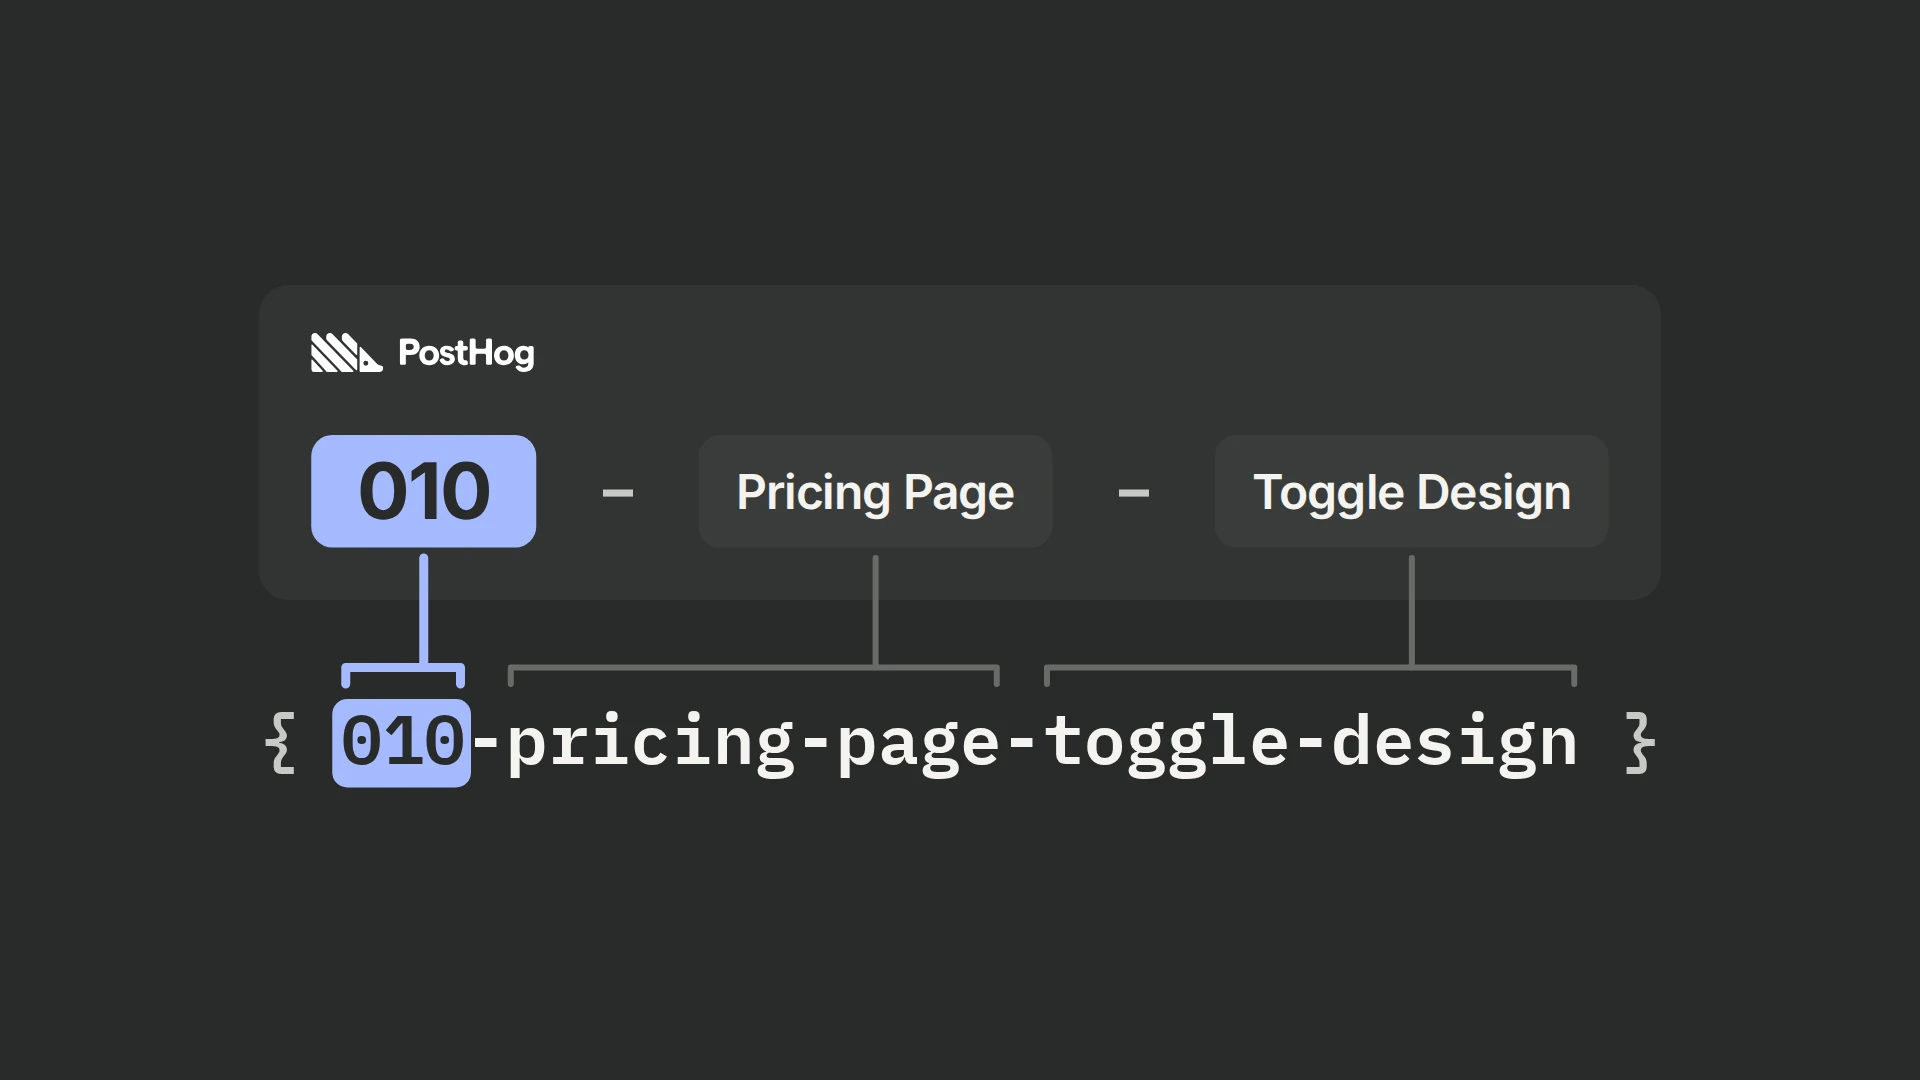
[Experiment number] – [Step of the Funnel/Page] – [Test Hypothesis]
For the feature flag key, we shorten the experiment name: the funnel step becomes a number or abbreviation, spaces become hyphens, and everything is lowercase, which keeps it easy to use in code.
Use 001-optin-page-heading-test for this example. See our PostHog experiment naming guidelines for the convention.
In Variant rollout, use the exact keys control, test_group_1, and test_group_2 to match the code below. For a standard A/B test, start with control and one treatment at equal weights; this example demonstrates two treatments. If you omit TG2, remove it from PostHog, the page, the hiding CSS, the eligibility check, and the variant map. More variants need more traffic to reach a reliable result. (+)
Continue to Analytics, then click Save as draft. Set the primary metric in Step 7 before launching.
After saving the draft, settle two things before launch, because changing them later changes who is counted. If your tracking calls identify() after the opt-in, open the experiment’s feature flag and select Device under Release conditions so the variant stays stable through identification on the same browser. (+) If the change is visible only after scrolling or opening a panel, plan a custom exposure at that point (see Verify Exposure and Conversion Together).
Step 3: Create the Test Element You Want to Test in ClickFunnels
Build a missing treatment element or duplicate an existing one, then change what the hypothesis calls for. Keep the rest of the layout and behavior the same so you can attribute the result to the change you intended.
- Label the original as Control.
- Label the test versions as TG1 and TG2, matching
test_group_1andtest_group_2in the code.
Depending on what you’re testing, the test group can be an element, section, row, or column.
Step 4: Hide Test Groups with Custom CSS
Hide the treatments so visitors see control while the runner waits for a variant. First, find the rendered CSS selector for the control and each treatment.
How to Find Each Element’s CSS ID:
- Classic: Click on the element and open Settings. Click Get CSS Info to reveal the CSS ID Selector.
- 2.0: Hover over the element or container and click its Code (<>) icon. (+) Click Generate ID or enter a custom ID, then click Update. Use
#before the ID in your selector.
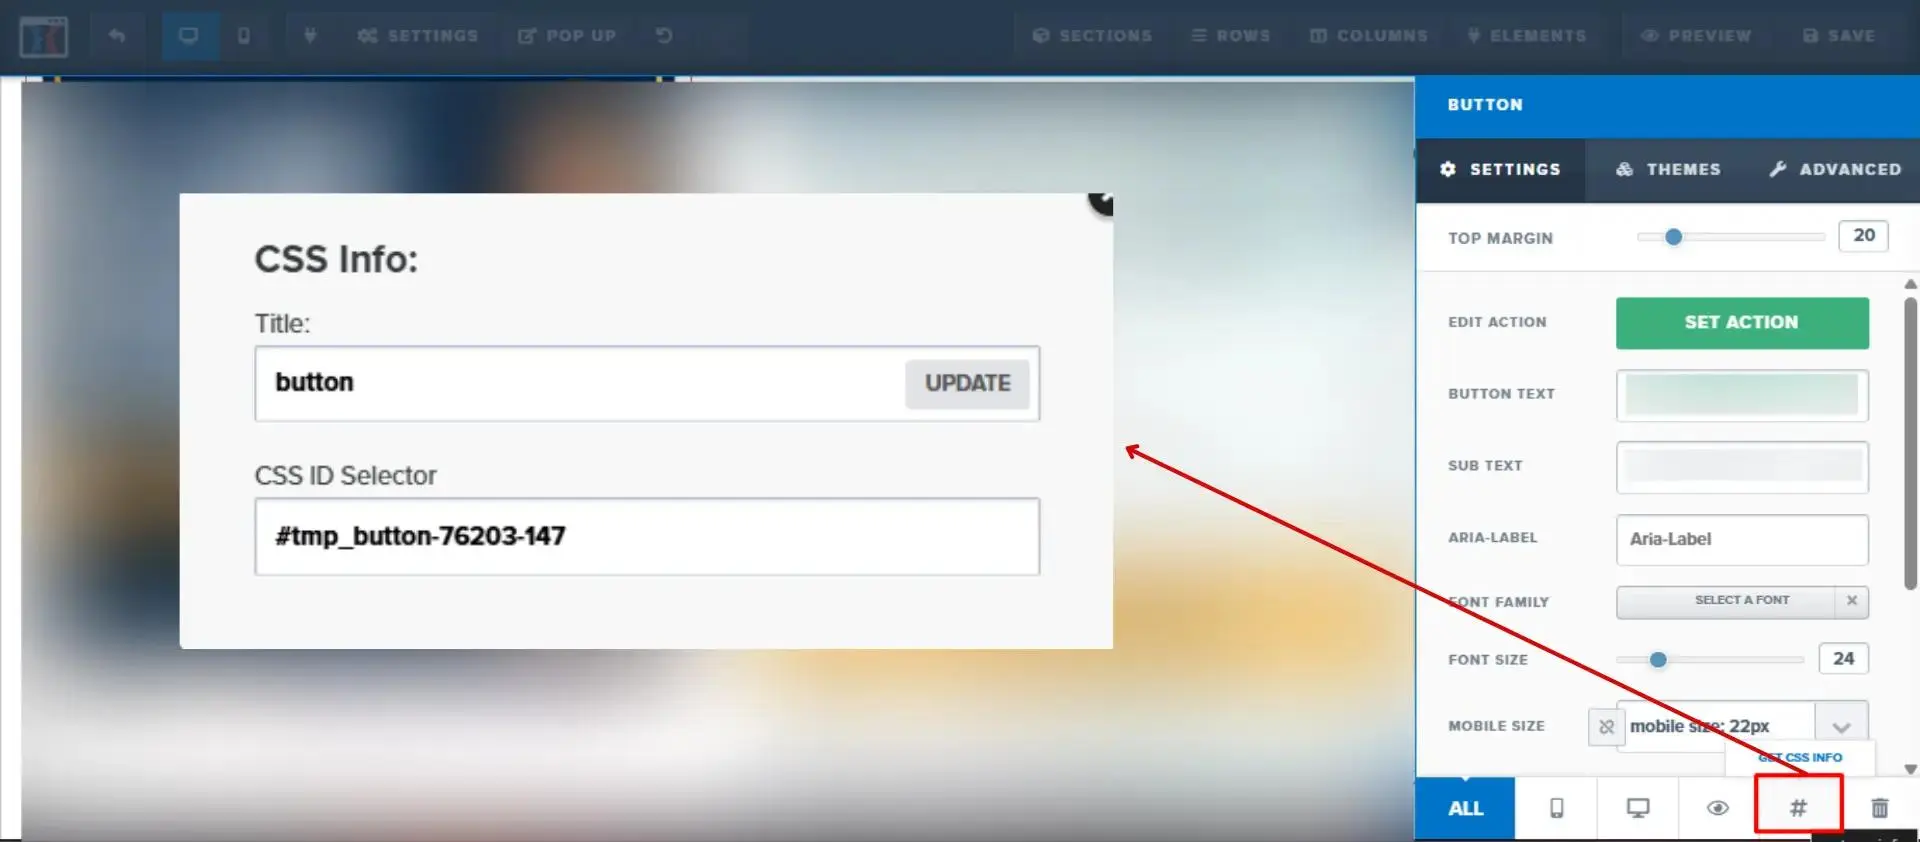
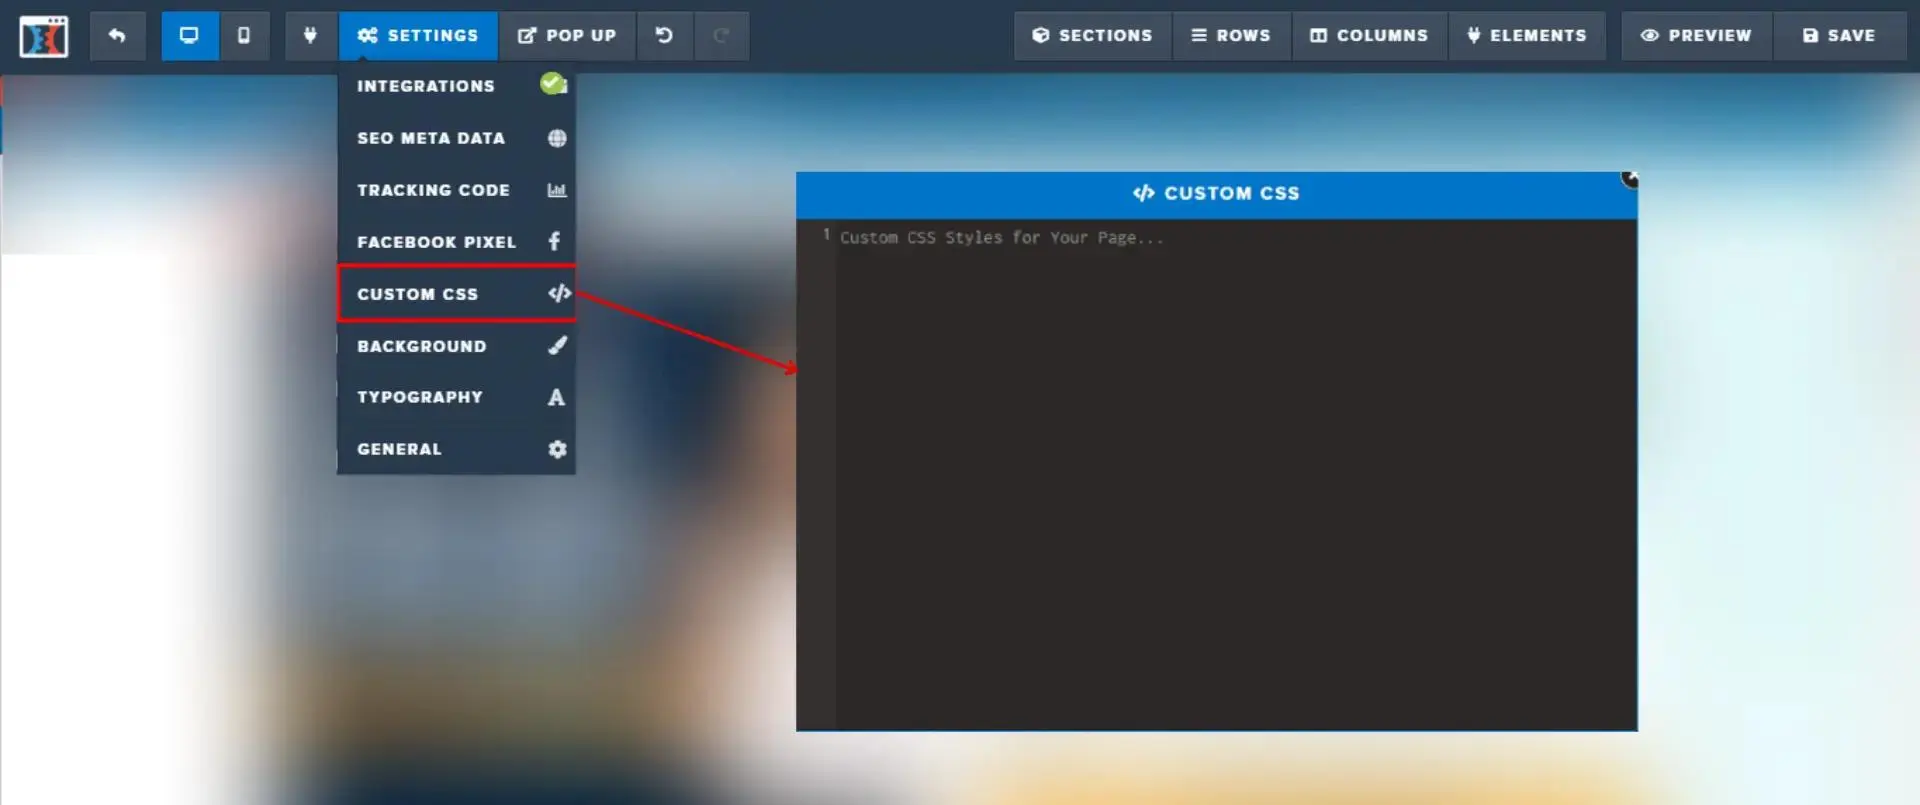
Classic: In the top bar, open Settings → Custom CSS.
2.0: Open Settings → Show Code → CSS. (+)
Add the following CSS after replacing the example selectors with the treatment selectors you just verified, then save the page.
#variant-one-element,
#variant-two-element {
  display: none !important;
}
Step 5: Add PostHog Page Experiments to the Footer
Classic: From the top menu, open Settings → Tracking Code. When the pop-up opens, switch to Footer Code.
2.0: In the page editor, open Customize (the gear icon), then Settings → Show Code → Footer Code. (+)
Paste the version-pinned bundle and configuration below, then save.
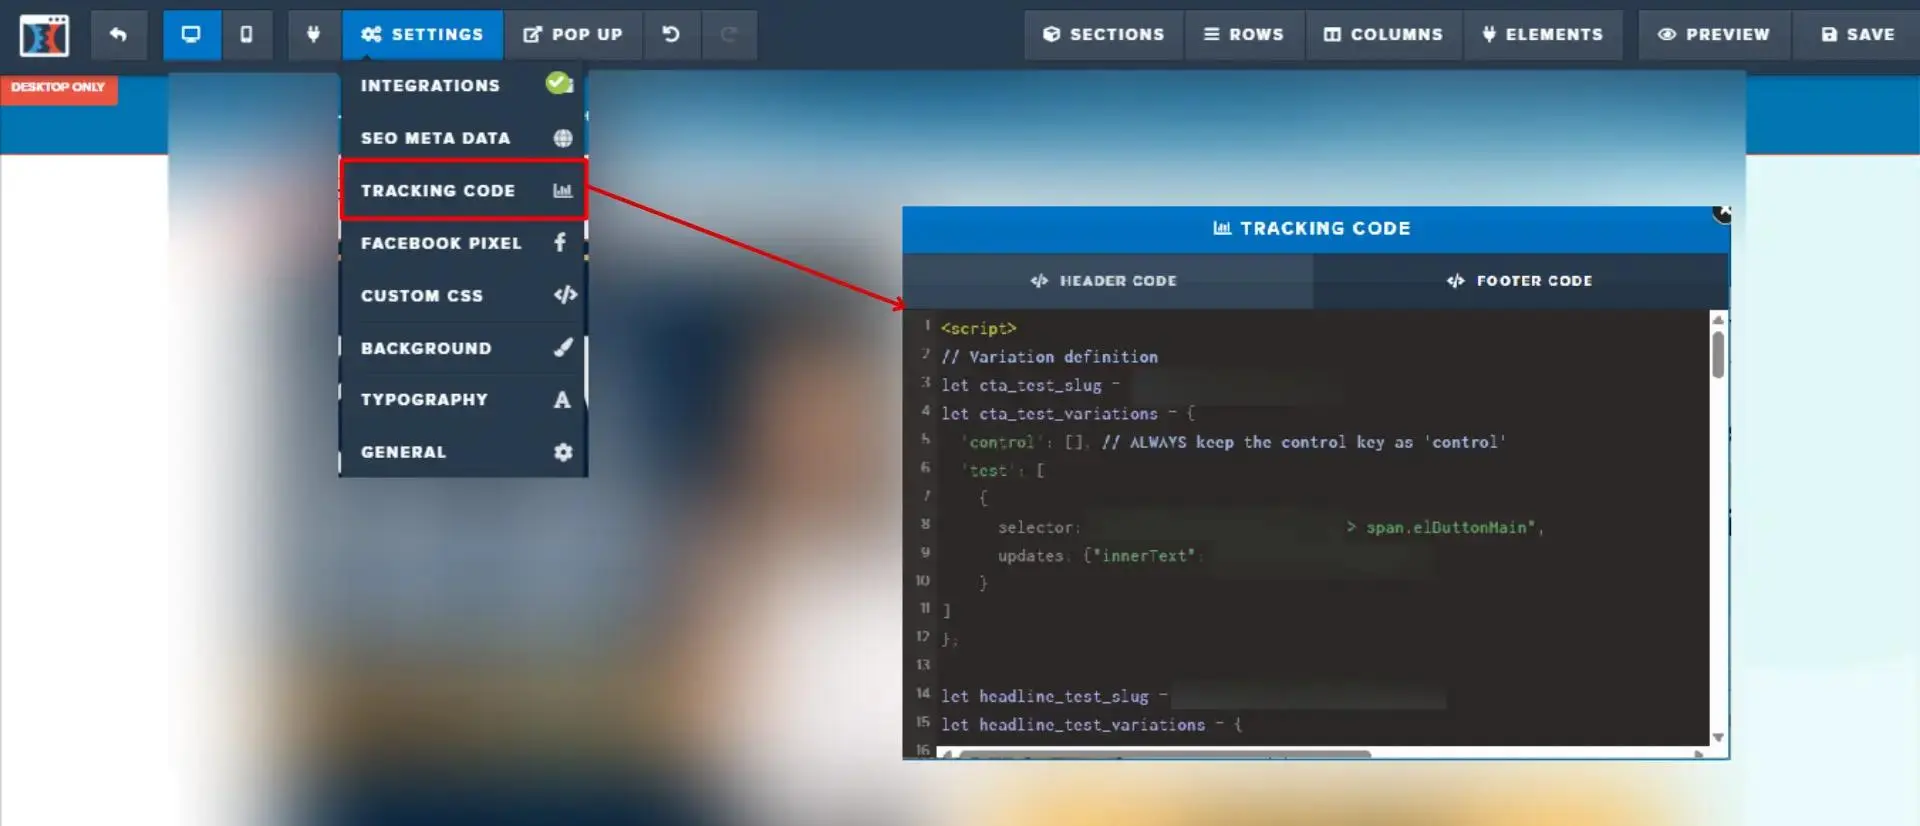
The example uses PostHog Page Experiments, our free, MIT-licensed JavaScript package, independent of PostHog. PostHog assigns visitors and analyzes the result. The package waits for the page, checks eligibility, applies variants, handles fallbacks and supports URL previews. You can call posthog.getFeatureFlag() directly if your own code handles readiness and rendering. Keep the bundle at 0.2.0 during the test and repeat QA before upgrading.
<script src="https://cdn.jsdelivr.net/npm/@99ways/[email protected]/dist/posthog-page-experiments.min.js"></script>
<script>
window.runExperiment('001-optin-page-heading-test', {
  isEligible: async () => {
    // A URL preview of a variant reads no flag; every other visit waits for consent.
    if (!new URLSearchParams(location.search).get('001-optin-page-heading-test')) {
      await window.analyticsConsent
      if (window.posthog?.has_opted_out_capturing?.()) return false
    }
    return ['#original-element', '#variant-one-element', '#variant-two-element'].every(selector =>
      document.querySelectorAll(selector).length === 1
    )
  },

  variants: {
    control: [],

    test_group_1: [
      {
        selector: '#original-element',
        updates: { style: { display: 'none' } },
      },
      {
        selector: '#variant-one-element',
        updates: { style: { display: 'block' } },
      },
    ],

    test_group_2: [
      {
        selector: '#original-element',
        updates: { style: { display: 'none' } },
      },
      {
        selector: '#variant-two-element',
        updates: { style: { display: 'block' } },
      },
    ],
  },
}).catch(error => console.error('Experiment error:', error))
</script>
Replace the feature flag key, in both places, and all three selectors with the exact values from ClickFunnels and PostHog. Replace the selectors inside isEligible as well as those in variants. The control remains visible when the visitor is ineligible, PostHog is unavailable, or the flag cannot be resolved.
The isEligible function confirms that every control and treatment target exists exactly once, after DOM readiness and before a URL override or flag evaluation. This skips pages where a target is missing or duplicated; it does not replace page or audience targeting. Keep the script on the intended page, and add any audience or page-state check the hypothesis requires to isEligible. The package otherwise accepts visitors by default and skips missing selectors. (+) Prefer page-level Footer Code here; ClickFunnels’ funnel-level Footer Code runs on every page in that funnel. (+)
isEligible first waits for window.analyticsConsent, which the consent code in our install guide resolves when the visitor accepts; URL previews skip the wait because they read no flag. Until acceptance, control shows and the flag is not read. A flag read before acceptance would drop its exposure: opting in does not resend it, and with the SDK’s default deduplication, later reads of the same value can stay suppressed across page loads. (+) The test therefore measures visitors who allow analytics, from the moment they accept: visitors who never accept see control and stay outside the analysis, and a late acceptor may already have read the original headline. With other consent code, create the promise in a head script that your consent tool does not block, and resolve it right after posthog.opt_in_capturing(). On a site without consent gating the value is undefined, and the check continues at once.
The runner applies styles with !important, so it can reveal a treatment hidden by the CSS above. The example uses display: block for a headline wrapper; use flex instead if the tested container needs a flex layout. The inline style also overrides ClickFunnels’ Desktop Only or Mobile Only visibility on the element it reveals, so reveal an all-device wrapper, or map and test each device’s version separately.
The runner applies the variant once. (+) Visitors may briefly see the original while it waits for PostHog. If the page later replaces an edited element, the runner does not apply the change again. Test the full interaction, including content loaded after the initial page load.
Step 6: Preview and Quality-Check Every Variant
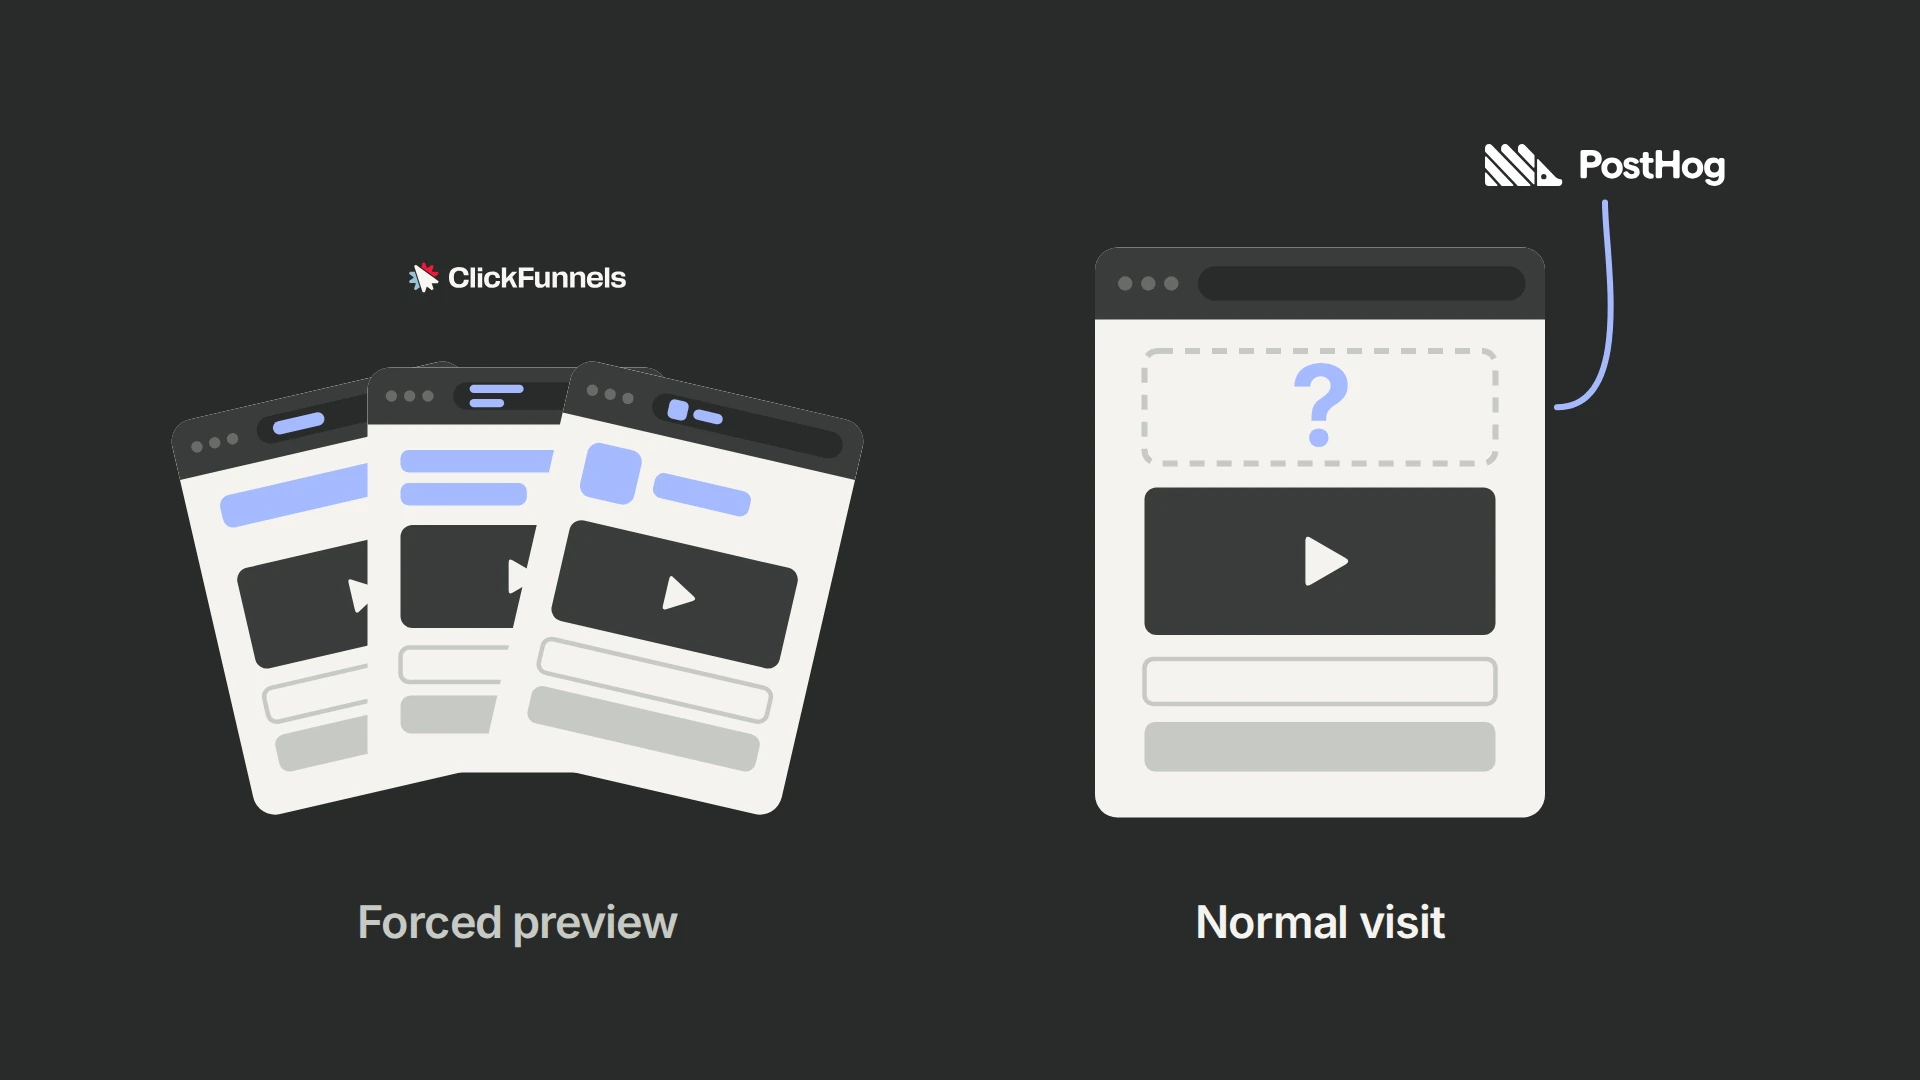
Preview each variant on the cloned funnel step by adding the exact feature flag key and configured variant name to its URL. Replace https://example.com/optin/ below with the clone’s URL:
https://example.com/optin/?001-optin-page-heading-test=control
https://example.com/optin/?001-optin-page-heading-test=test_group_1
https://example.com/optin/?001-optin-page-heading-test=test_group_2
A valid URL override is applied without requesting a PostHog assignment. Eligibility still runs first, and an unknown variant falls back to control.
- Only the requested version is visible.
- The surrounding funnel step remains unchanged.
- Mobile and desktop layouts work.
- Buttons, forms, and step navigation still work.
- Repeated page loads do not duplicate or compound a change.
- The browser console shows no experiment or form errors.
Remove the query parameter while the flag is still disabled: the page should show control. Forced previews prove the rendering, not assignment or measurement; Step 7 tests a real assignment before launch.
Open the browser console to see the runner’s assignment summary: it reports the variant, source, flag value, and a note explaining a fallback. A forced preview should show source: url. Read the flag value and note too: source: posthog can still accompany a false or missing flag value and a fallback to control.
Remove a required treatment target in a safe preview. The example should keep control and make no flag call. Restore it, then block PostHog’s requests and confirm the original page and form remain usable.
To watch forced variants render, open our experiment test page on the 99Ways site. It runs the same runner on 99Ways, not ClickFunnels, and uses its own demo flag.
Step 7: Deploy, Verify, and Launch the Experiment
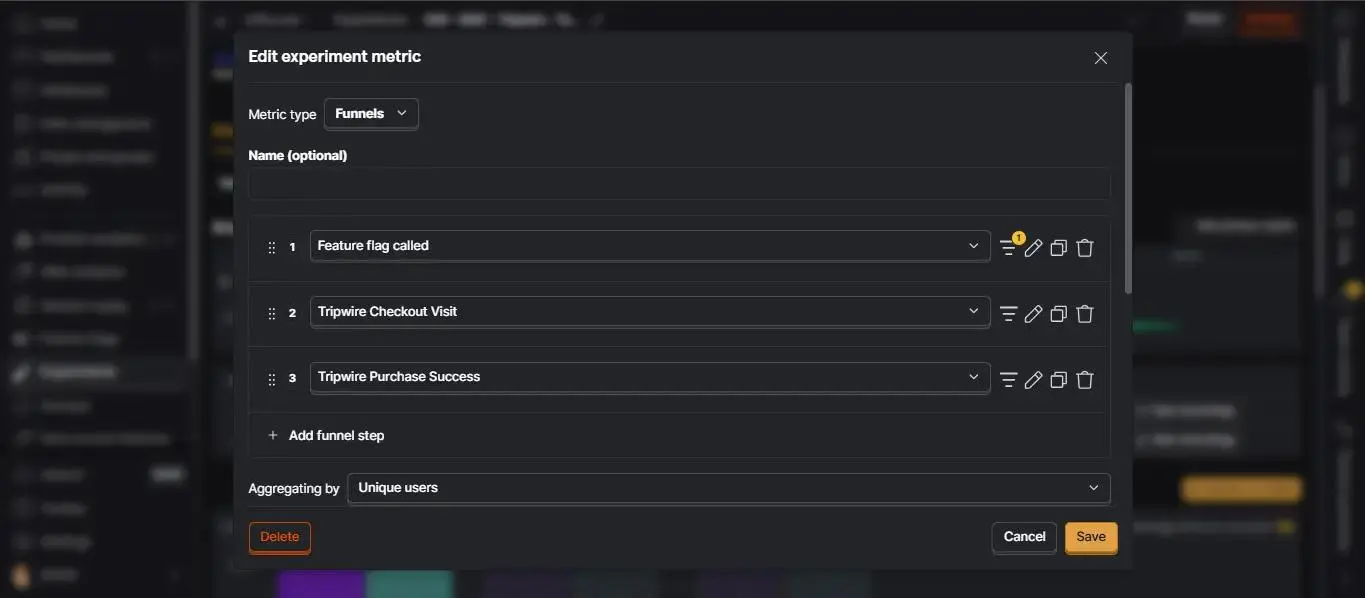
Set the primary metric in your saved experiment, keeping it as a draft while you work on the cloned page. For an opt-in test, the funnel could be experiment exposure → successful opt-in. Measure a successful form submission or created lead rather than assuming a button click completed it.
- Open the saved experiment in PostHog → Experiments.
- Under Primary metrics, click Add primary metric and choose a Funnel metric.
- Add
lead_form_submittedonly if it fires after a successful opt-in, or use a$pageviewfiltered to the thank-you step reached after success. Use the event and URL from your own funnel. - Set a conversion window that matches how long you will allow a visitor to complete the opt-in, then save.
PostHog adds the exposure as the first funnel step automatically; add only the outcome after it. (+) An initial opt-in pageview can happen before the runner evaluates the flag, so do not use that earlier event as a required post-exposure step. The outcome event needs no flag property: PostHog attributes it through the participant’s exposure. (+)
Move the tested treatments, CSS and runner configuration to the original live funnel step, keeping its URL and position in the funnel. Use its existing control element and copy only the changes you tested:
- 2.0: On the clone, hover over each treatment element, click its Save icon, name it, and click Save Element. (+) Leave Make element Universal unchecked. Open the original step’s ⋮ → Edit Page. Choose Add Element → Saved in My Elements, then select the saved treatment and place it as on the clone. For a whole row or section, use the corresponding Save Row / Save Section and Add Row / Add Section → Saved controls.
- Classic: Open the original step’s Edit Page button and repeat the element duplication and content edits you validated on the clone.
- Both editors: Read the live control and treatment CSS IDs again using Step 4. Update the selectors in the hiding CSS,
isEligible, and both treatment configurations. Paste the CSS into the live page’s CSS field and the runner into its Footer Code field, using the editor paths above, then click Save.
If you deploy by swapping the original and cloned URL paths instead, recheck the clone’s funnel position, upstream links, and URL-based event filters. Test from the preceding step; a working direct URL alone does not prove the funnel sends visitors to the intended page.
On the live URL, repeat the forced previews and remove the parameter to check control while the flag is disabled. Enter through the preceding funnel step and follow the real next-step navigation.
Test a Real Assignment Before Launch
Runner URL overrides bypass normal flag evaluation, so test real assignment before launch, as PostHog recommends. (+) Record the flag’s production release conditions first. Then open the experiment’s feature flag and add a condition set at the top of the list where $initial_utm_source (Initial UTM source) equals posthog-qa, with its rollout at 100% and its Optional override set to test_group_1. Set every other condition’s rollout to 0%: a visitor who matches any condition set receives a variant. (+) Check Enable feature flag and save; the experiment stays a draft. The browser SDK sends the first page’s UTM source with flag requests, so the QA condition matches an anonymous visitor. (+)
Close all private windows, start a new private session and open the live URL with ?utm_source=posthog-qa&experiment-debug as its first page. The runner’s summary should show source: posthog with the flag value test_group_1, and TG1 should be visible. In Activity, find the exposure event the experiment uses, $feature_flag_called, $experiment_exposure or your custom exposure, with this flag’s key and test_group_1. (+) Complete an opt-in and find its outcome event for the same participant. Repeat with the override set to test_group_2 and then control, in a new private session each time, so a variant that is missing or misspelled in PostHog shows up now. Finally, in another new private session without the QA parameter, check that the page shows control.
When every variant passes, disable the flag and save. Then delete the QA condition set, restore the recorded production conditions and save again. Click Launch in the experiment header: launching enables the flag and starts the experiment.
After launch, start a new private session and open the live page with ?experiment-debug and no other parameter. Confirm source: posthog and a flag value of control, test_group_1, or test_group_2, then reload to check that the variant stays stable. When QA is finished, drop experiment-debug from your test URLs and set log: 'silent' in the configuration; the URL switch overrides the silent setting.
Verify Exposure and Conversion Together
A flag check should count as exposure only when the visitor could see the change. (+) For the headline above the form, check that the assigned headline is visible. For a change reached only after scrolling or opening a panel, use a custom exposure at that point; include $feature/your-flag-key with the assigned variant and choose that event in the experiment’s exposure criteria before launch.
If capture waits for consent, accept the banner on the experiment page during the pre-launch test. Control should show until you accept; then the assigned variant and its exposure should appear. On a clean, unforced visit, a treatment that appears before acceptance points to an early flag read: check the assignment summary and the exposure event.
If you selected Device bucketing in Step 2, verify the submitted lead still belongs to the exposed participant; device bucketing does not join identities across separate domains.
Exclude staff, forced previews and QA URLs from the production analysis. The runner’s URL override does not request assignment, but the form can still send conversion events. Enable test account filtering in the exposure criteria: it applies your project’s internal-user filters, so define them first with our internal-user filtering guide and check that your QA browser matches them. (+) After launch, check that exposures and the primary metric begin accumulating.
Frequently Asked Questions
Does this guide use ClickFunnels Classic or 2.0?
Both. The ClickFunnels screenshots show the Classic interface; the steps also name the 2.0 controls for cloning, CSS IDs, custom CSS, and Footer Code. Follow the instructions for your editor and verify the selectors on the published page.
Can PostHog and ClickFunnels split the same experiment traffic?
Use PostHog to assign visitors and leave ClickFunnels’ native split test off. Running both would introduce another split in the same traffic, which needs its own experiment design and analysis.
What happens if PostHog does not load?
After the default four-second timeout, the runner applies control. (+) With the treatments hidden and control: [], the original page stays available. Set featureFlagTimeoutMs if you need a different wait. The wait starts after isEligible finishes, so it does not run while consent is pending.
Should the runner remain after the experiment?
No. End the experiment in PostHog, build the chosen version into the page permanently, and remove the experiment-specific elements, hiding CSS and runner configuration. Then disable or delete the feature flag.
Troubleshooting and Further Reading
If the treatment appears to reduce conversions, check that the page shows the assigned version and records the intended action. Use ?experiment-debug to see how the runner chose the variant, and PostHog’s experiment troubleshooting to investigate missing exposures or outcomes. For a wider review of assignment and measurement, use the experimentation system audit.
Keep the hypothesis, targeting, bucketing, variant content, traffic split and metric definition stable while collecting data. If an implementation bug changes what visitors see or what you measure, pause and resolve it before interpreting the result.