
If you want to use PostHog on Shopify, you have a few different setup options.
The right choice depends on what you need PostHog to do. A store owner who wants basic product analytics and session replays may not need the same setup as a technical team building custom events, experiments, checkout tracking, warehouse reporting, and attribution logic.
The main options are:
- Manual PostHog install.
- PixieHog.
- Trackify.
- Third-party automation and integration platforms such as Zapier, Make, or RudderStack.
Each method can work, but they are not equal. Some install PostHog on the storefront. Others only forward Shopify events. Some are better for no-code setup. Others are better when PostHog is a core analytics system and you need control over event names, properties, privacy behavior, and experiment logic.
This guide compares the main Shopify PostHog integration methods so you can choose the setup that fits your store.
The Short Answer
Use this rule of thumb:
| Use case | Best option |
|---|---|
| You want the most control | Manual install |
| You want the easiest PostHog-only setup | PixieHog |
| You want to send Shopify events to several analytics tools | Trackify |
| You only need backend event syncing | Zapier, Make, or RudderStack |
| You want session recordings, heatmaps, feature flags, or experiments | Manual install or PixieHog-style storefront install |
| You want exact custom events and properties | Manual install |
The key question is this:
Do you need PostHog running in the shopper’s browser, or do you only need Shopify events sent into PostHog after they happen?
If you need browser behavior, session recordings, heatmaps, autocapture, or client-side experiments, PostHog must actually run on the storefront. If you only need orders, customers, or backend events synced into PostHog, an automation platform may be enough.
What a Good Shopify PostHog Setup Should Capture
Before comparing tools, define what you want from the integration.
For most Shopify stores, useful PostHog tracking includes:
- Storefront pageviews.
- Product views.
- Collection views.
- Add-to-cart events.
- Cart updates.
- Checkout started.
- Checkout completed.
- Purchase or order completed.
- Customer identification when appropriate.
- UTM and referrer properties.
- Session recordings.
- Autocaptured clicks and form interactions.
- Experiment or feature flag exposure events.
Not every integration method captures all of this. A backend sync can send orders, but it cannot show what the visitor clicked before buying. A storefront snippet can capture behavior, but it may need extra work to capture checkout events depending on how it is installed.
That is why the implementation method matters.
Option 1: Manual PostHog Install
Manual installation means you add PostHog to Shopify yourself and wire the events you care about.
This can include:
- Adding the PostHog JavaScript snippet to the storefront.
- Using Shopify Customer Events and Web Pixels for checkout and customer event tracking.
- Sending standard ecommerce events into PostHog.
- Creating custom events for important business actions.
- Controlling event names, properties, identity behavior, consent logic, and feature flags.
When Manual Install Is Best
Manual install is usually best when:
- PostHog is a strategic analytics layer for the business.
- You have a developer or technical operator available.
- You need exact event naming.
- You need custom event properties.
- You want strong control over consent and privacy.
- You want to run PostHog experiments on the storefront.
- You want to debug data quality directly.
- You need to connect PostHog data to paid ads, CRM, or warehouse reporting.
Manual setup gives you the most flexibility. You decide exactly what gets tracked and how it appears in PostHog.
Where Manual Install Can Go Wrong
Manual does not automatically mean better. It is better only when it is implemented well.
Common failure points include:
- Installing the snippet only in the theme and missing checkout events.
- Duplicating events by using both an app and custom code.
- Sending inconsistent event names.
- Forgetting consent requirements.
- Missing UTM parameters on conversion events.
- Identifying users too early or too aggressively.
- Breaking tracking after a theme update.
If you go manual, document the event plan before writing code. A clean tracking plan is more important than getting the snippet onto the site quickly.
How to Verify Manual Install
After setup, check:
- PostHog Activity receives
$pageviewevents. - Product and cart events appear with product properties.
- Checkout and purchase events appear.
- UTM and referrer data is preserved.
- Session recordings work if enabled.
- Feature flags work if you plan to use experiments.
- Consent behavior matches your privacy setup.
- Duplicate events are not being sent.
Manual install is the most powerful option, but it needs proper QA.
Option 2: PixieHog
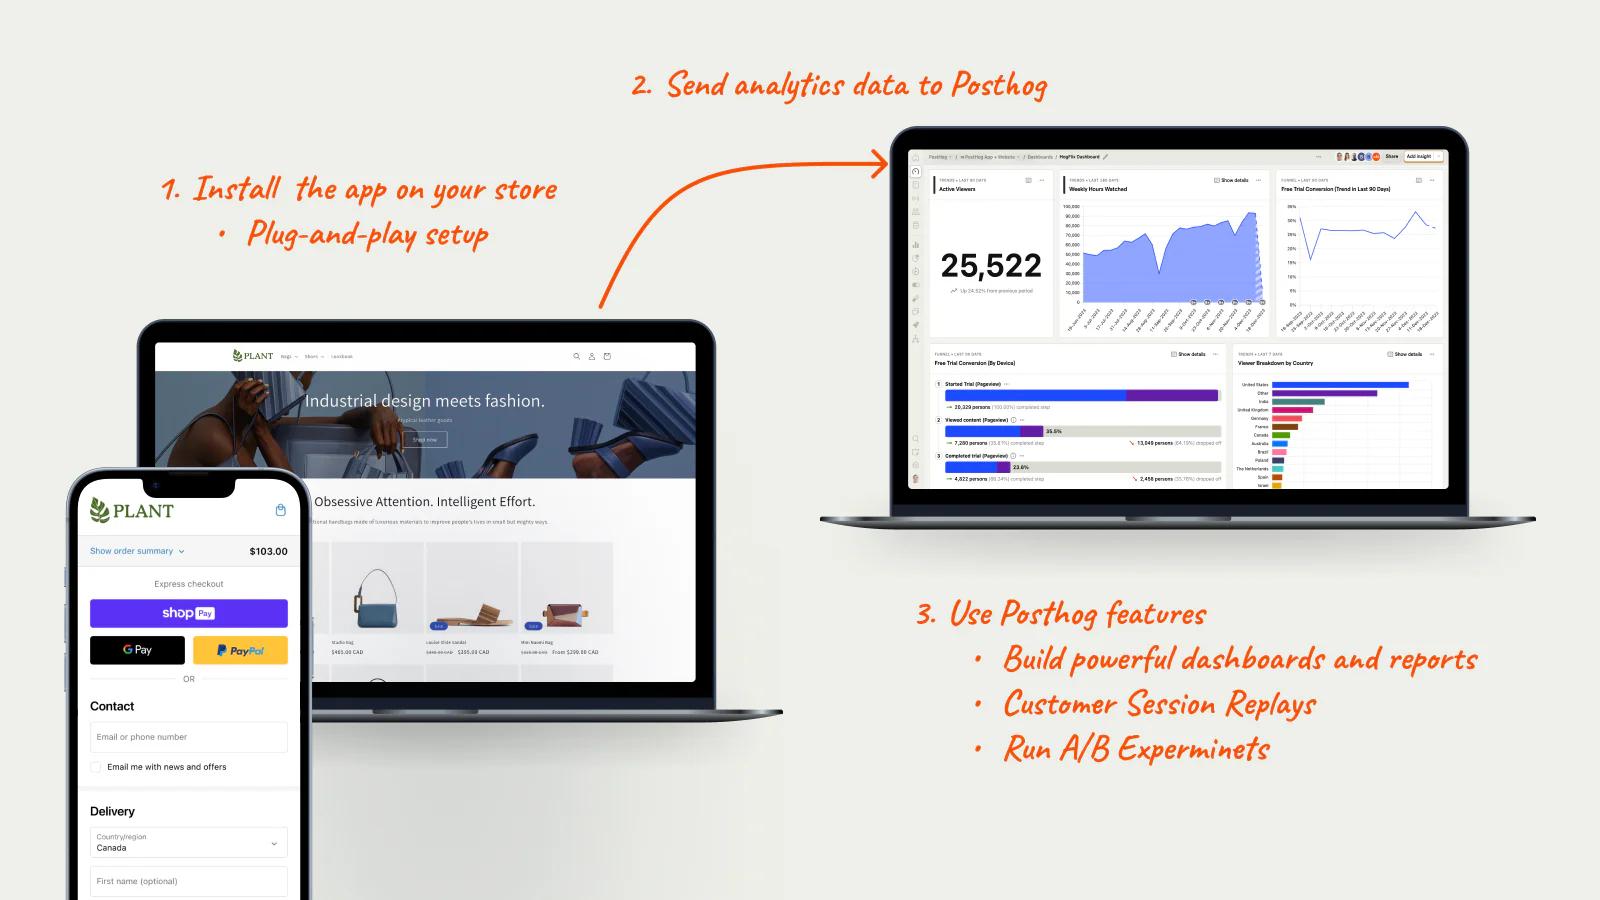
PixieHog is a Shopify app built specifically to connect Shopify with PostHog.
It is designed for merchants who want PostHog on Shopify without writing custom tracking code. The app can use Shopify’s Web Pixels API and the PostHog JavaScript setup, and its own documentation describes support for Shopify web pixel events, PostHog JS configuration, session replay, feature flags, and privacy-related settings.
When PixieHog Is Best
PixieHog is usually the best fit when:
- You want PostHog only, not several analytics tools.
- You want a faster setup than manual installation.
- You do not want to edit theme files.
- You want Shopify event tracking without building every event from scratch.
- You want access to PostHog features such as funnels, session recordings, and experiments.
- You want an app that is designed around PostHog rather than a generic event router.
For many Shopify merchants, this is the easiest path: install the app, connect the PostHog project API key and host, configure settings, then verify events in PostHog.
Where PixieHog May Be Limited
PixieHog is simpler than manual setup, but you still rely on the app’s event model and configuration options.
You may need manual work if:
- You need unusual custom events.
- You need very specific event names or property names.
- You have a complex custom theme.
- You have a headless Shopify setup.
- You need custom experiment logic beyond the app’s supported configuration.
- You want to deeply customize identity behavior.
For standard Shopify tracking, PixieHog may be enough. For a complex analytics architecture, manual tracking may still win.
How to Verify PixieHog
After installing PixieHog, test:
- Page views.
- Product views.
- Add to cart.
- Checkout started.
- Checkout completed.
- Session replay, if enabled.
- Feature flags or experiments, if needed.
- Consent behavior through Shopify privacy settings.
Use PostHog Activity and Shopify’s pixel testing tools to confirm events are actually firing.
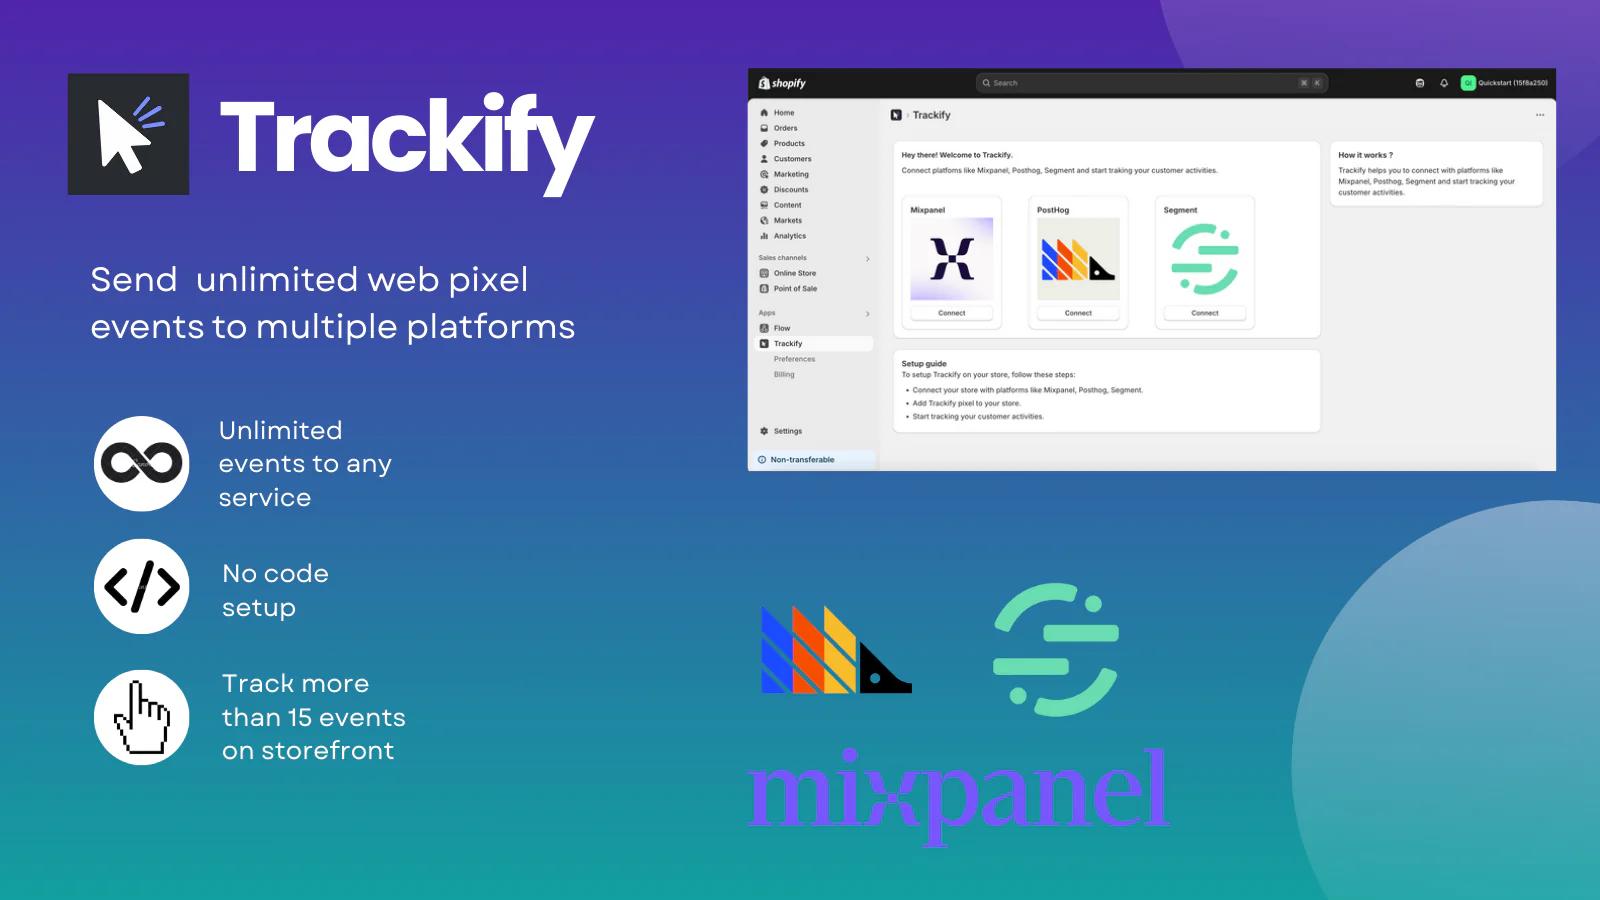
Option 3: Trackify
Trackify is a Shopify app that sends store events to tools such as Mixpanel, PostHog, and Segment.
Its main advantage is centralization. Instead of installing separate tracking for every analytics platform, you can send events to multiple destinations from one place.
When Trackify Is Best
Trackify is usually a better fit when:
- You use PostHog alongside Mixpanel, Segment, or another analytics platform.
- You want one app to manage several destinations.
- You want a no-code or low-code setup.
- You only need the supported Shopify event types.
- You do not want to maintain separate snippets for each analytics tool.
If your store already has a mixed analytics stack, Trackify can reduce implementation overhead.
When Trackify Is Not the Best Fit
If PostHog is your main analytics platform, Trackify may be more than you need.
You may prefer PixieHog or manual install when:
- You only care about PostHog.
- You want PostHog-specific configuration.
- You need exact control over feature flags or experiments.
- You want to avoid paying for a multi-destination app.
- You need custom event mapping beyond the app’s options.
Trackify is useful when PostHog is one destination in a broader stack. It is less compelling when PostHog is the whole stack.
How to Verify Trackify
After setup, test:
- Which event types are enabled.
- Whether events arrive in PostHog.
- Whether event names are clear.
- Whether product, cart, checkout, and order properties are included.
- Whether the same events are being duplicated by another PostHog install.
- Whether other destinations receive the same events consistently.
The biggest risk with multi-destination tools is assuming all platforms receive identical, clean data. Verify each destination separately.
Option 4: Zapier, Make, RudderStack, and Other Integration Platforms
Automation and integration platforms can connect Shopify to PostHog by forwarding events between systems.
Examples include:
- Zapier.
- Make.
- RudderStack.
- Other event routing or automation tools.
These tools are useful for specific workflows, but they are not the same as installing PostHog on your Shopify storefront.
When Integration Platforms Are Best
Use this route when:
- You only need a few backend events in PostHog.
- You want to send orders, customers, or fulfillment events.
- You need to connect Shopify events to several tools.
- You want workflow automation, not browser analytics.
- You need a temporary bridge before building a fuller setup.
Example use cases:
- Send
order_createdto PostHog. - Send customer tags to PostHog.
- Send subscription status changes into PostHog.
- Forward refund events.
- Trigger CRM or support workflows based on Shopify activity.
What You Lose With Backend-Only Sync
If PostHog is not running on the storefront, you will not get the full browser analytics experience.
You may lose:
- Autocapture.
- Session recordings.
- Heatmaps.
- Frontend click tracking.
- Feature flags on the storefront.
- Client-side experiments.
- Browser-level debugging.
- Full pre-purchase behavior.
You can still analyze events in PostHog, but you are analyzing synced events, not the shopper’s full on-site journey.
That is fine for some workflows. It is not enough for CRO-heavy Shopify analytics.
Shopify Web Pixels vs Theme Snippets
Shopify now manages many tracking use cases through Customer events and the Web Pixels API.
Shopify’s own documentation explains that pixels can be added through app pixels or custom pixels. App pixels are installed through apps, while custom pixels can be manually added in the Shopify admin. Shopify also notes that app pixels using the Web Pixels API run in an isolated environment designed for performance, security, and privacy.
This matters because older Shopify tracking advice often says “paste the script into the theme.” That can still help for storefront behavior, but it may not cover checkout or customer events properly.
For a serious PostHog setup, think in two layers:
- Storefront JavaScript for browser behavior, session replay, autocapture, feature flags, and experiments.
- Shopify Customer Events or Web Pixels for commerce and checkout lifecycle events.
The best integration method is the one that covers the events you actually need without creating duplicates.
How to Choose the Right Shopify PostHog Integration
Use these decision rules.
Choose Manual Install If
- You have technical support.
- You need custom tracking.
- You need exact event naming and properties.
- You want full control over identity and consent.
- You want to run serious experiments in PostHog.
- You need to connect events to ad attribution or warehouse reporting.
Choose PixieHog If
- You want the fastest PostHog-focused setup.
- You do not want to write code.
- You want standard Shopify events in PostHog.
- You want PostHog session replay, funnels, and experiments without a full custom implementation.
- You prefer a Shopify app built around PostHog specifically.
Pick Trackify If
- You use several analytics tools.
- You want Shopify events sent to PostHog, Mixpanel, Segment, or similar tools from one app.
- You want low-code event routing.
- PostHog is one part of your analytics stack, not the only destination.
Use Zapier, Make, or RudderStack If
- You only need backend event sync.
- You are connecting Shopify to operational workflows.
- You do not need session recordings, heatmaps, or frontend experiments.
- You need a simple bridge between Shopify and PostHog.
Common Mistakes to Avoid
Treating every integration as equivalent
An app pixel, theme snippet, custom pixel, and automation workflow can all send data, but they do different jobs.
Installing PostHog twice
If you use both manual scripts and an app, you can accidentally duplicate events. Duplicates make funnels and conversion rates unreliable.
Ignoring checkout coverage
Storefront page tracking is not enough if you care about checkout and purchase behavior. Confirm the setup covers the full path.
Assuming session replay works with backend sync
Zapier, Make, and similar tools can forward events, but they cannot record browser sessions unless PostHog is actually running in the browser.
Skipping consent and privacy checks
Shopify pixels interact with customer privacy settings. PostHog also has privacy and consent configuration. Make sure both sides match your legal and analytics requirements.
Not documenting event names
Even app-based tracking should be documented. Write down the events, properties, and meanings so future reports are easier to understand.
How to Verify Your Shopify PostHog Integration
No matter which method you choose, verify it before trusting the data.
Check:
- A live storefront pageview appears in PostHog.
- Product view events arrive.
- Add-to-cart events arrive.
- Checkout started events arrive.
- Purchase or checkout completed events arrive.
- UTM parameters are available where needed.
- Customer identity is handled intentionally.
- Session recordings work if enabled.
- Feature flags work if you plan to use experiments.
- No duplicate events are created.
- Consent behavior works as expected.
Run one safe test order if possible. A setup that captures pageviews but misses purchases is not ready for decision-making.

Why This Matters for CRO
PostHog on Shopify is useful because it can connect behavior to outcomes.
With a clean setup, you can answer questions like:
- Which product pages create add-to-cart behavior?
- Where do shoppers drop before checkout?
- Which campaigns bring visitors who actually buy?
- Which variant won an A/B test?
- Which sessions show friction before purchase?
- Which product, page, or audience segment needs CRO work?
The integration method decides the quality of those answers.
A quick app install may be enough for a standard store. A manual setup may be better for a store where PostHog is central to CRO and revenue analysis. A backend sync may be enough for operational event reporting.
Choose the method based on the decision you need the data to support.
Frequently asked questions
Is there an official PostHog Shopify app?
There is no first-party Shopify app maintained by PostHog for every merchant use case. The practical options are manual setup, third-party Shopify apps, or event routing platforms.
What is the easiest way to install PostHog on Shopify?
For many non-technical merchants, PixieHog is the easiest PostHog-focused option because it is designed to connect Shopify and PostHog without custom code.
When is manual install better?
Manual install is better when you need full control over event names, event properties, identity, consent, custom tracking, feature flags, experiments, and debugging.
When should I use Trackify?
Use Trackify when you want to send Shopify events to multiple analytics tools, such as PostHog, Mixpanel, and Segment, from one Shopify app.
Can Zapier or Make install PostHog on my Shopify storefront?
No. They can sync events between Shopify and PostHog, but they do not provide the same browser-side PostHog experience as a storefront install.
Can I use session recordings and heatmaps on Shopify?
Yes, if PostHog is actually running on the storefront and the relevant features are enabled. Backend-only event sync does not provide session recordings or heatmaps.
Can I run PostHog experiments on Shopify?
Yes, if PostHog feature flags can run in the shopper's browser and your storefront has logic to show the right variant. Backend-only integrations are not enough for client-side experiment assignment.
Do I need a developer?
You may not need a developer for PixieHog or Trackify. You probably need one for manual setup, custom events, headless Shopify, complex checkout behavior, or advanced experiment logic.
Which method is most accurate?
Accuracy depends on implementation quality. Manual setup can be the most precise, but only if it is well planned and QA'd. Apps can be more consistent for standard events, but less flexible.
Will PostHog slow down my Shopify store?
Any added JavaScript can affect performance, but a clean implementation should keep overhead reasonable. Shopify's Web Pixels API is designed to run pixels in a controlled environment, and app pixels can reduce messy manual script management.
Is Shopify PostHog tracking compatible with GDPR?
It can be, but the setup must honor consent, privacy settings, data retention, and PII rules. Shopify Customer Privacy controls and PostHog privacy settings should be reviewed together.