
Quick answer: Clone the ClickFunnels funnel step, create the control and treatment elements, hide treatments by default, and add the PostHog Page Experiments browser runner to the footer. Preview every configured variant through the URL, move the validated implementation to the established live funnel step, verify normal PostHog assignment and conversion events, and only then launch the experiment.
Requirements:
- An active PostHog project.
- The PostHog browser script installed on ClickFunnels.
- Access to clone and edit the intended funnel step.
- A clear hypothesis, configured variant keys, and a conversion event that can serve as the primary metric.
This example uses separate ClickFunnels elements for control and two treatments. For a simple copy or style change, the runner can update an existing element directly without duplicating it. For the same implementation pattern in another page builder, see the WordPress A/B testing guide.
Step 1: Duplicate the Page You Want to Test
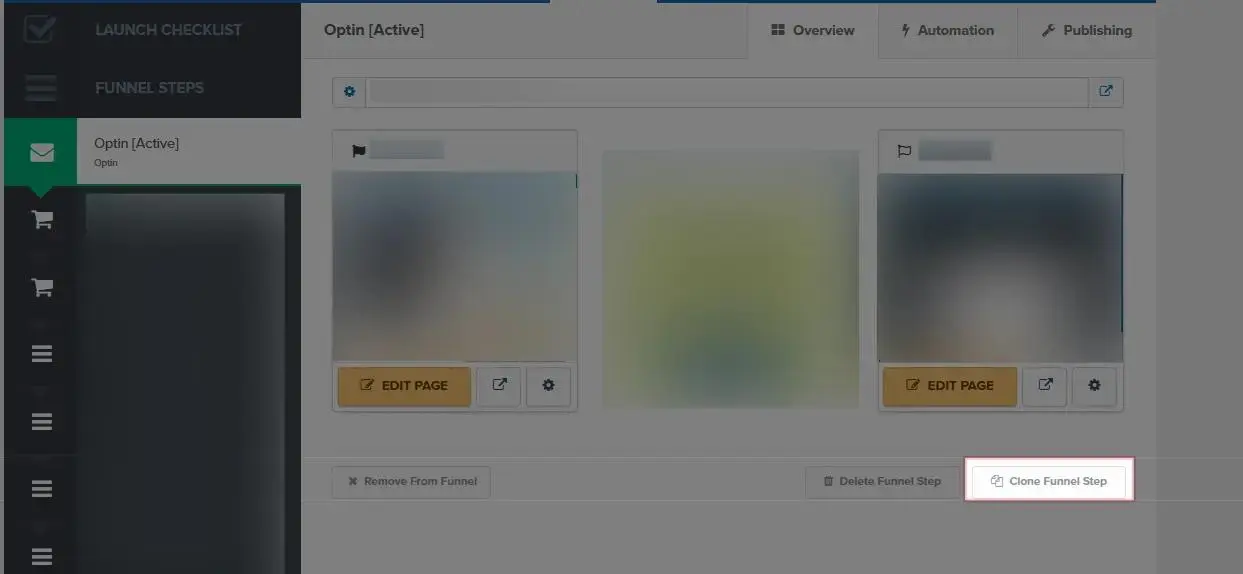
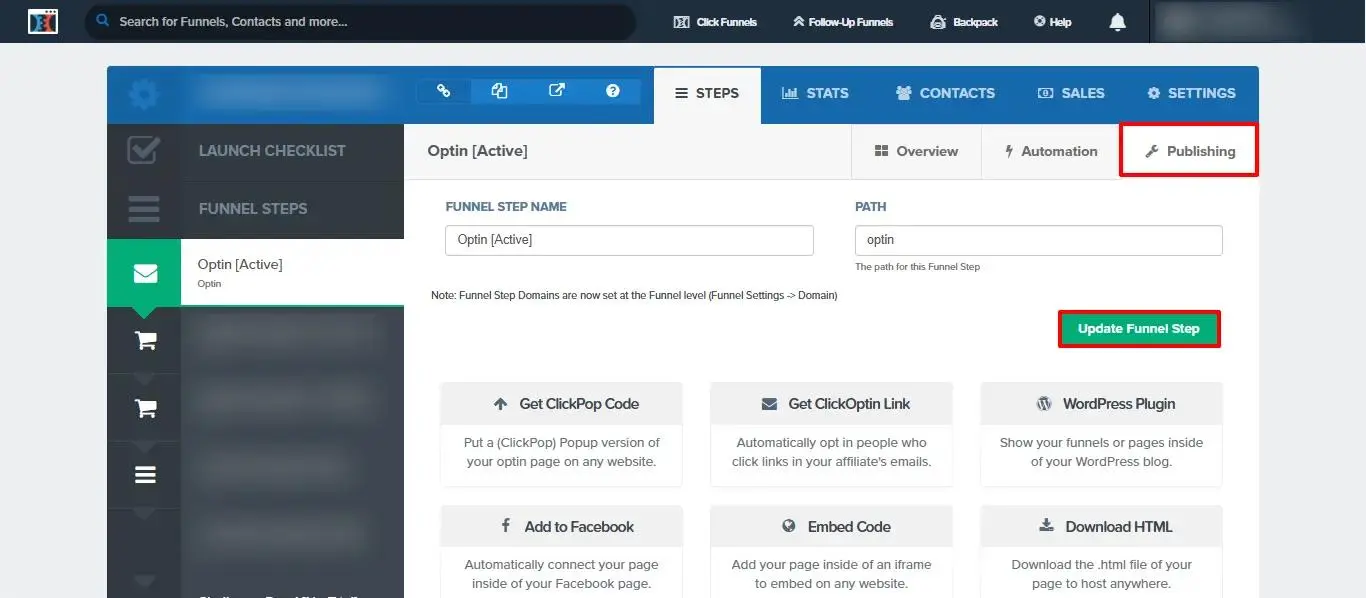
Log in to your ClickFunnels account. Duplicate the intended page by clicking on the Clone Funnel Step button. Once the page reloads, go to the Publishing tab and give the cloned step a unique name. Click Update Funnel Step to save.
By duplicating the page, you protect the original from unintended changes.
Step 2: Create Your Experiment in PostHog
- Log into PostHog.
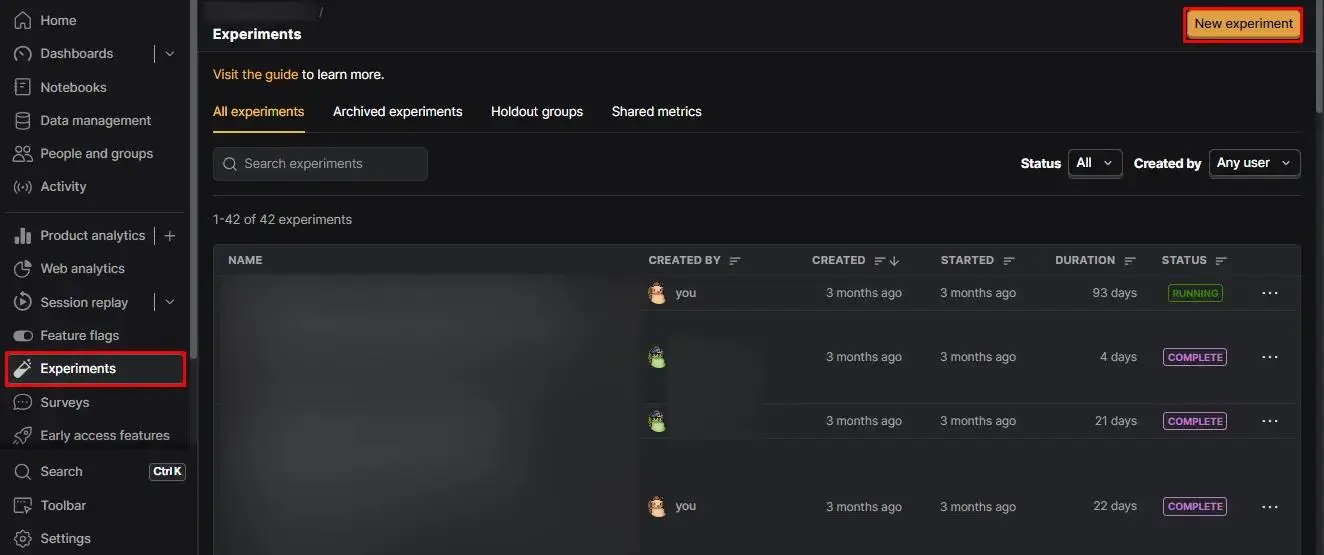
- From the left sidebar, go to Experiments > click New Experiment
Fill in the required fields:
We use this general format for experiment name:
[Experiment number] – [Step of the Funnel/Page] – [Test Hypothesis]
For Feature flag key, we use something very similar to the Experiment name, with a few changes—like converting the step of the funnel/page into a number or abbreviation, removing spaces, and keeping everything lowercase for easier implementation in code.
Refer to this PostHog Experiment Naming Guidelines for best practices.
Click Save as draft.
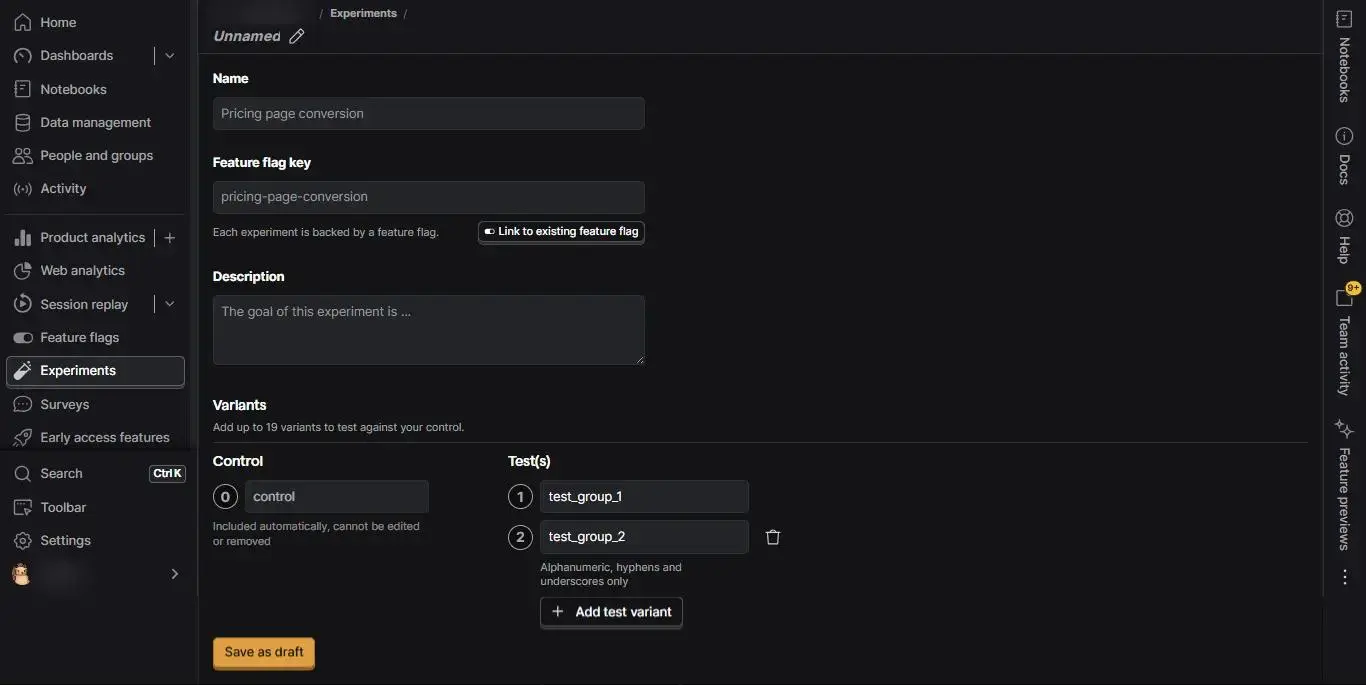
For a step-by-step guide on creating an experiment in PostHog, click here.
Step 3: Create the Test Element You Want to Test in ClickFunnels
For a control and two treatments on the same layout, either build a missing treatment element from scratch or duplicate an existing element and change only what the hypothesis requires. Keeping unrelated layout and behavior consistent makes the result easier to interpret.
- Label the original as Control
- Label the test versions as TG1, TG2, etc.
Depending on what you’re testing, the test group can be an element, section, row, or column.
Step 4: Hide Test Groups with Custom CSS
Hide the treatment elements by default so control remains the safe fallback until the footer runner applies an assigned variant. First retrieve the rendered CSS selector for every control and treatment element.
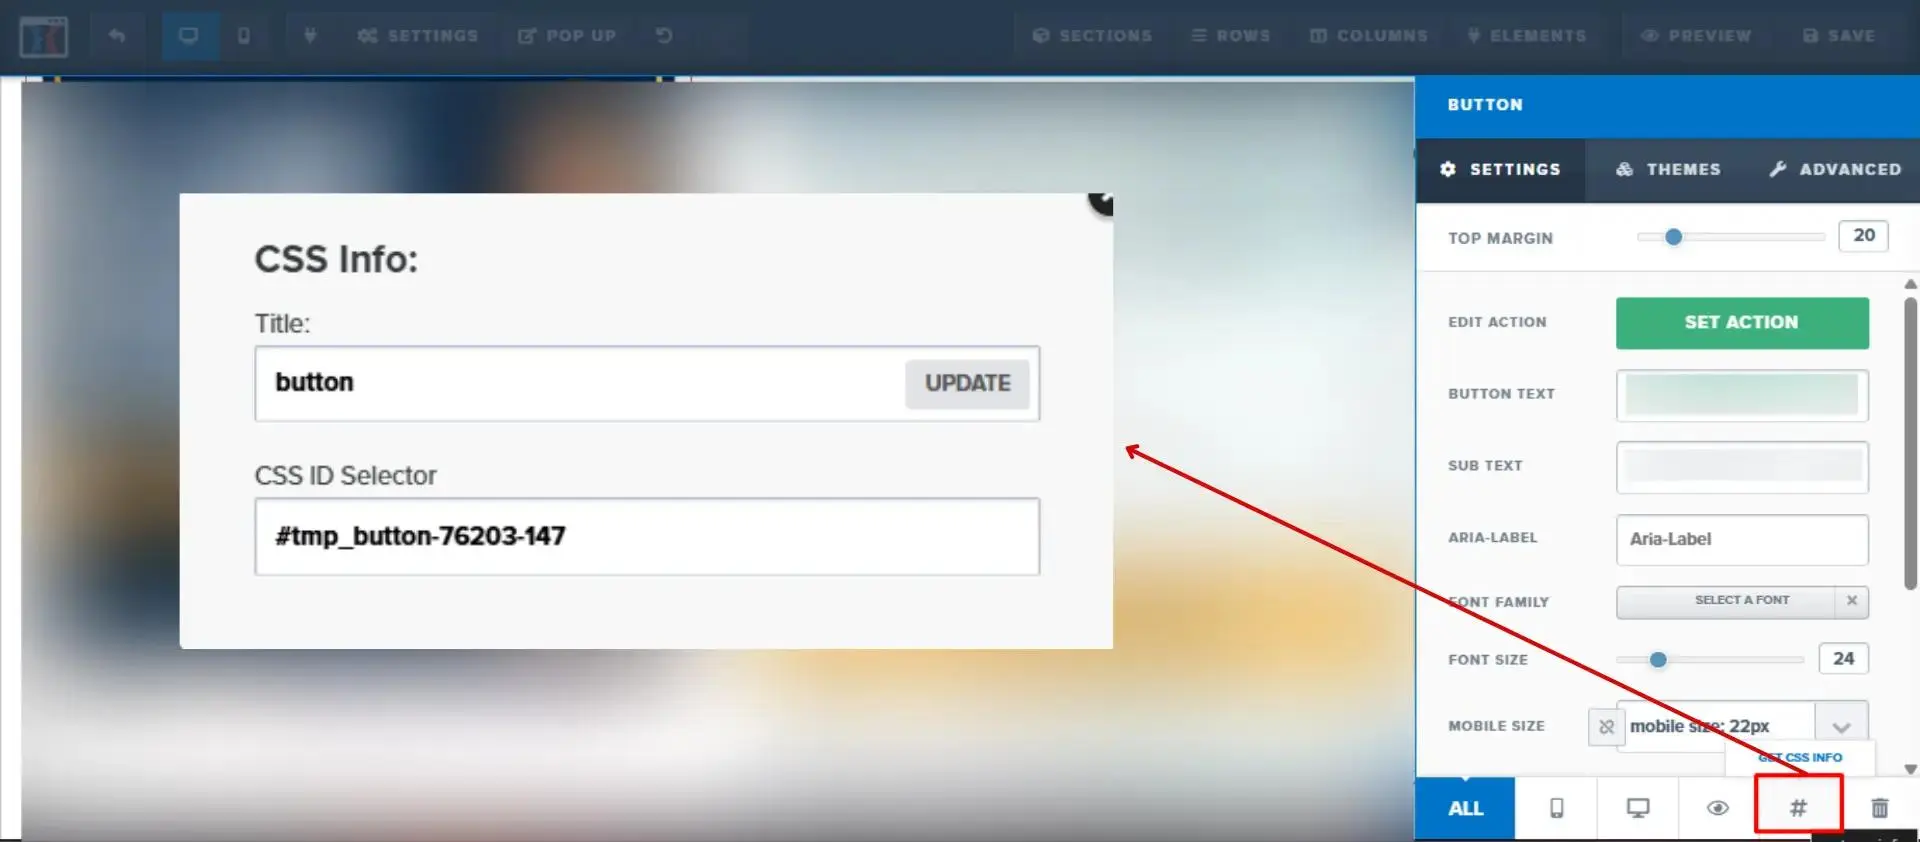
How to Find Each Element’s CSS ID:
- Click on the element > open Settings.
- Click Get CSS Info to reveal the CSS ID Selector.
In the top bar, open Settings and then Custom CSS. Add the following CSS after replacing the example selectors with the treatment selectors you just verified.
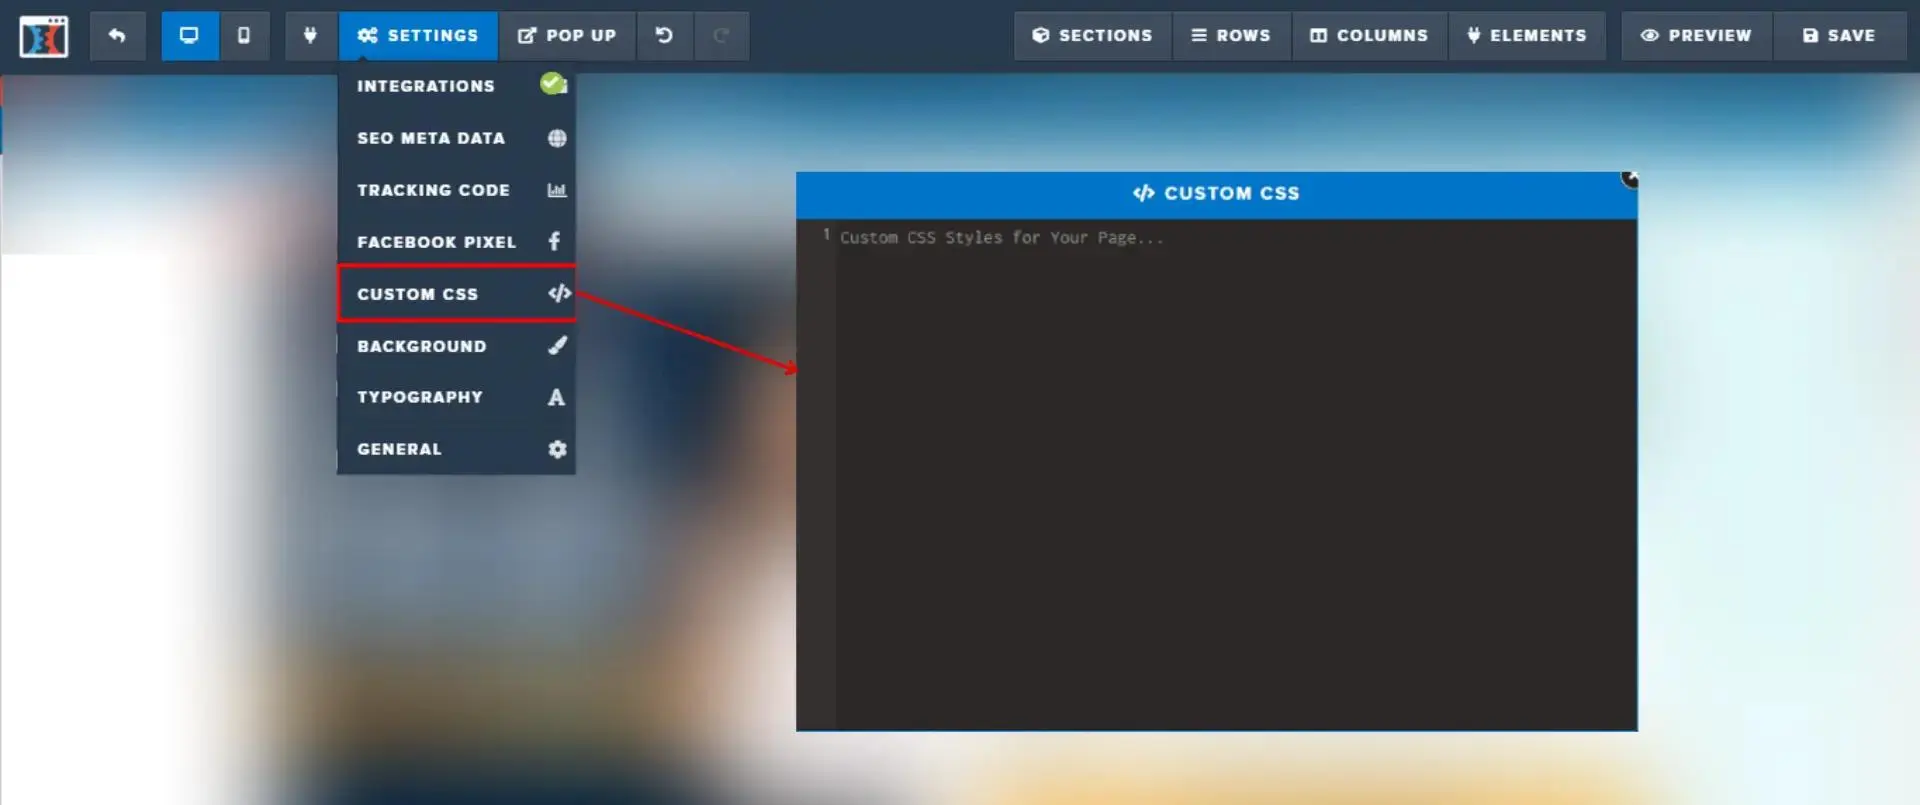
#variant-one-element,
#variant-two-element {
  display: none !important;
}
This keeps the layout clean and prevents variant elements from showing when not in use.
Step 5: Add PostHog Page Experiments to the Footer
From the top menu, open Settings, select Tracking Code, and switch to Footer Code. Add the version-pinned browser bundle and the configuration below.
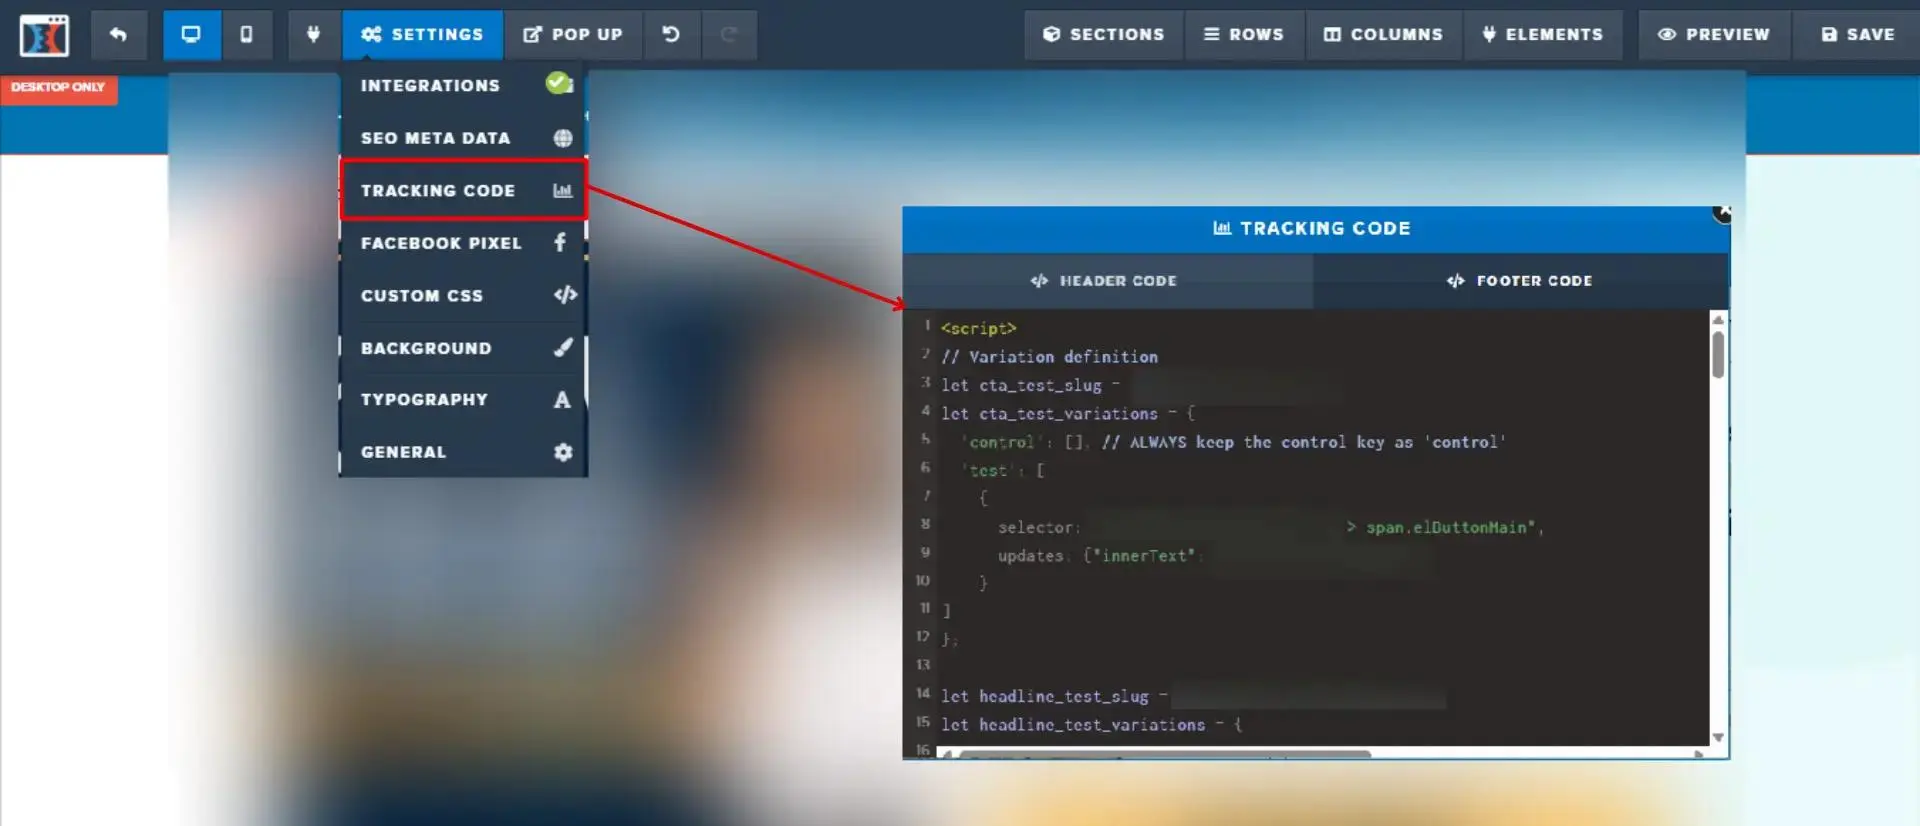
The implementation below uses PostHog Page Experiments, a free, MIT-licensed JavaScript package from 99Ways. PostHog still assigns visitors and analyzes the experiment; the package handles DOM readiness, the eligibility check, safe fallback, variant execution, and URL-based QA. It is also available as @99ways/posthog-page-experiments on npm.
<script src="https://cdn.jsdelivr.net/npm/@99ways/[email protected]/dist/posthog-page-experiments.min.js"></script>
<script>
window.runExperiment('001-optin-page-heading-test', {
  variants: {
    control: [],

    test_group_1: [
      {
        selector: '#original-element',
        updates: { style: { display: 'none' } },
      },
      {
        selector: '#variant-one-element',
        updates: { style: { display: 'block' } },
      },
    ],

    test_group_2: [
      {
        selector: '#original-element',
        updates: { style: { display: 'none' } },
      },
      {
        selector: '#variant-two-element',
        updates: { style: { display: 'block' } },
      },
    ],
  },
}).catch(error => console.error('Experiment error:', error))
</script>
Replace the feature flag key and all three selectors with the exact values from ClickFunnels and PostHog. Keep the treatment elements hidden by default. The control remains visible when the visitor is ineligible, PostHog is unavailable, or the flag cannot be resolved.
The eligibility function confirms that all elements needed by any possible assignment exist before PostHog evaluates the flag. That prevents unrelated funnel steps or broken element mappings from entering the experiment through this call.
Step 6: Preview and Quality-Check Every Variant
Quality-check the experiment on the cloned funnel step, then add the exact feature flag key and configured variant name to its URL:
https://example.com/optin/?001-optin-page-heading-test=control
https://example.com/optin/?001-optin-page-heading-test=test_group_1
https://example.com/optin/?001-optin-page-heading-test=test_group_2
A valid URL override is applied without requesting a PostHog assignment. Eligibility still runs first, and an unknown variant falls back to control.
- Only the requested version is visible.
- The surrounding funnel step remains unchanged.
- Mobile and desktop layouts work.
- Buttons, forms, and step navigation still work.
- Repeated page loads do not duplicate or compound a change.
- No relevant browser-console errors appear.
After checking forced variants, remove the query parameter and verify a normal PostHog assignment. Forced preview proves the rendering; it does not prove that normal assignment and experiment activity are working.

Step 7: Deploy, Verify, and Launch the Experiment
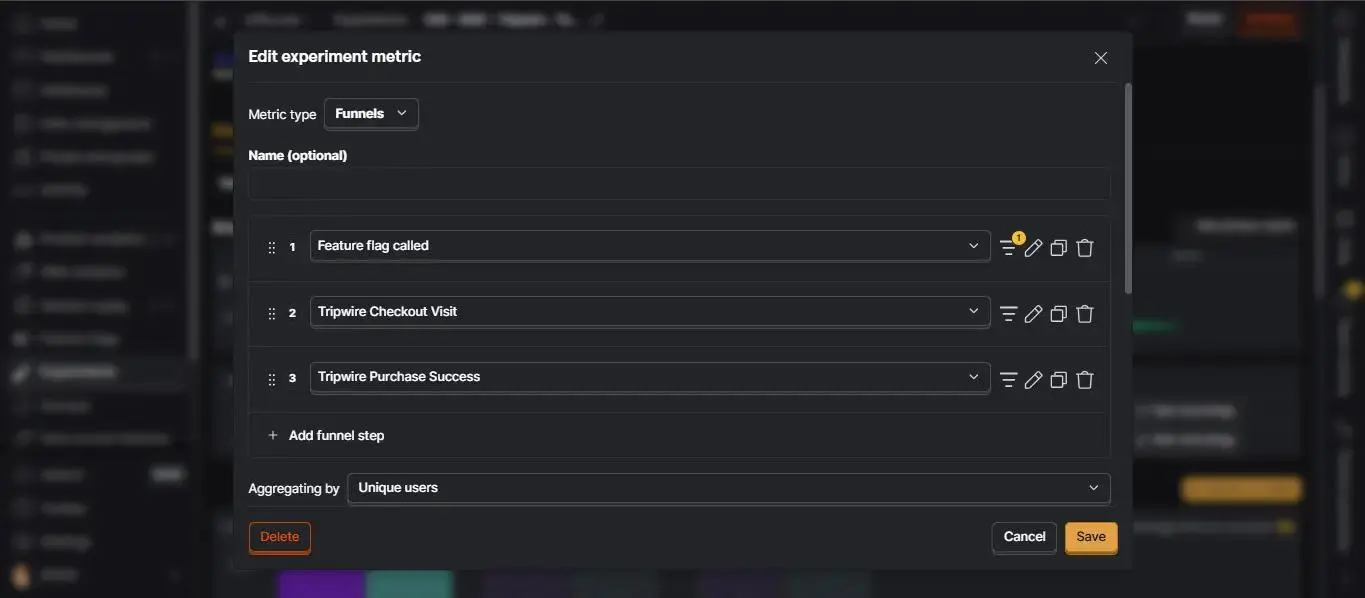
Configure the primary metric in the saved PostHog experiment, but keep the experiment as a draft while the ClickFunnels implementation is still isolated on the cloned step. PostHog’s experiment metrics documentation explains the available metric types and attribution settings.
- Open the saved experiment in PostHog.
- Under Primary metrics, click Add primary metric.
- Choose the event, funnel, or other metric that best represents the business outcome.
- Set the attribution type and conversion window, then save.
Move the validated elements, Custom CSS, and footer configuration into the established live funnel step or use your documented ClickFunnels deployment workflow. Preserve the live URL by default; swapping cloned and original URLs can affect links, tracking, and funnel navigation and should be treated as a separate migration decision.
While the PostHog experiment is still a draft, verify the live URL, every forced variant, normal flag evaluation, and the conversion event. Use the experimentation system audit when the wider assignment or measurement setup also needs review. Launch only after those checks pass.
After launch, confirm experiment activity and the primary metric immediately. Avoid changing treatment content while the experiment is running unless you are fixing a documented implementation problem.
Frequently Asked Questions
Why clone the ClickFunnels funnel step first?
The clone provides an isolated place to create elements, configure selectors, and verify the runner without changing the established live step. Cloning is a preparation workflow, not automatic permission to replace the live URL.
Do I always need separate treatment elements?
No. Duplicate elements when the treatment needs prebuilt ClickFunnels content. For a simple trusted copy or style change, the runner can update an existing element directly.
What does PostHog Page Experiments handle?
It waits for DOM and PostHog readiness, runs your eligibility check before flag evaluation, maps the assigned variant, falls back safely, applies the configured DOM changes, and supports deterministic URL previews. PostHog still owns assignment and analysis.
Which identifiers must match?
The feature flag key and variant keys must match PostHog exactly. The CSS selectors must match the rendered ClickFunnels elements. Eligibility should verify every element required by a possible assignment.
How do I quality-check a variant?
Use ?feature-flag-key=variant-key on the cloned step, repeat the visual and functional checks for every configured variant, then separately test a normal visit without the override.
What happens if PostHog does not load?
After the configured timeout, the runner applies the default variant. With control as the default and treatment elements hidden, the original funnel experience remains available.
When should I launch the PostHog experiment?
Only after the implementation is on the intended live funnel step and normal assignment plus the conversion event have been verified there.
Should the runner remain after the experiment?
No. Once the final experience is implemented permanently, remove the experiment-specific elements, hiding CSS, and runner configuration.
External & Internal References
- PostHog Page Experiments on GitHub
- PostHog Page Experiments on npm
- How to install PostHog on ClickFunnels
- How to run a PostHog A/B test on WordPress
- PostHog experiment naming guidelines
- PostHog Experiments documentation